Introduction
Building a hardware product in 2026 is more accessible than ever, but that doesn’t mean it’s easy. With the rise of IoT, affordable development boards, and global manufacturing access, almost anyone can start building a product. However, this accessibility has also increased competition, making it harder to succeed without a solid strategy. Many founders jump in with excitement, invest heavily in prototyping, and only later realize they’ve made critical mistakes that could have been avoided early on.
Unlike software, hardware development is unforgiving. Every mistake has a physical cost—whether it’s redesigning a PCB, replacing components, or reworking firmware. These costs add up quickly, both financially and in terms of time. A poorly planned project can easily burn through thousands of dollars before reaching a usable stage.
The key to success is not speed but strategy. If you take the time to validate your idea, make smart decisions, and follow a structured approach, you can significantly reduce risk and build something that actually works in the real world.
Why Most Hardware Startups Fail
Most hardware startups fail long before they reach the market, and the reasons are often predictable. It’s rarely about lack of talent or effort. Instead, it comes down to poor early decisions that create long-term problems. Founders often get excited about their idea and rush into building without fully understanding the market, the technology, or the real costs involved.
These early mistakes don’t always show immediate consequences. In fact, everything might seem fine during the initial stages. But as development progresses, issues begin to surface—performance problems, unexpected costs, delays, and lack of user interest. By then, fixing these problems becomes expensive and time-consuming.
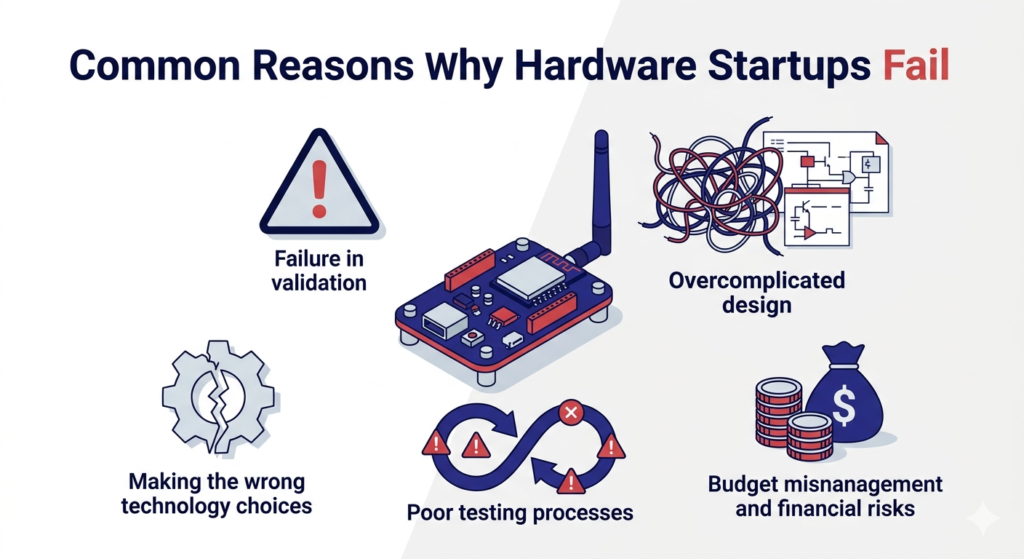
Common Reasons Behind Failure
- Building a product without validating demand
- Trying to include too many features in the first version
- Choosing the wrong hardware or communication technology
- Skipping or rushing the testing process
- Underestimating costs and running out of budget
The important thing to understand is that most of these problems are preventable. With the right mindset and process, you can avoid these traps and build a much stronger foundation for your product.
Step 1: Validate Your Idea First
Validation is the single most important step in hardware development, yet it is often ignored because it doesn’t feel like “real progress.” Many founders prefer building over researching because it feels more productive. However, skipping validation is one of the fastest ways to waste money and time.
A validated idea ensures that you are solving a real problem that people actually care about. It also helps you refine your product concept before investing in development. Without validation, even a perfectly engineered product can fail because there is no demand for it.
The goal of validation is to replace assumptions with real data. Instead of guessing what users want, you learn directly from them. This not only improves your idea but also gives you confidence moving forward.
Simple Ways to Validate
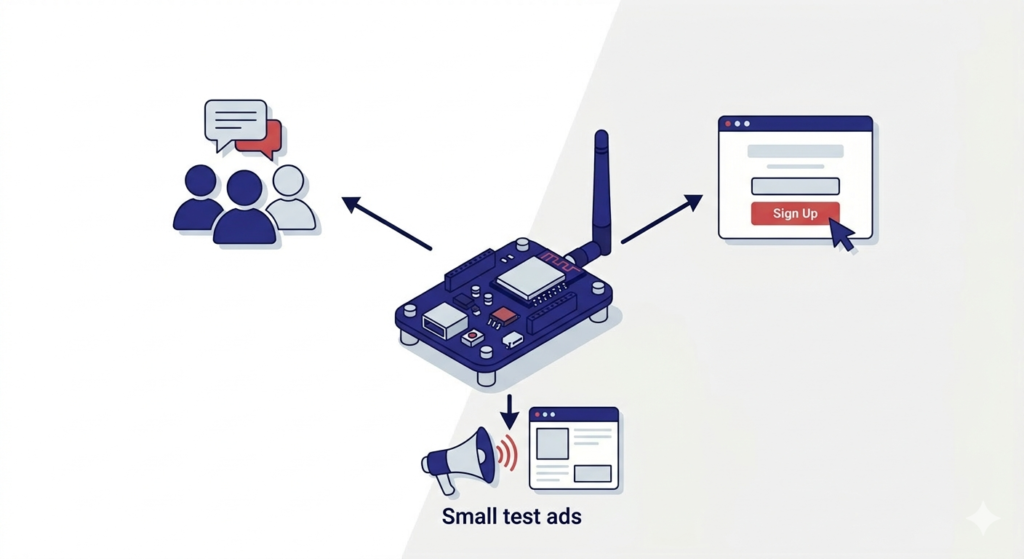
- Talk to potential users and understand their daily challenges
- Create a simple landing page explaining your idea
- Run small ad campaigns to measure interest
- Collect feedback and identify patterns
Validation doesn’t need to be complicated or expensive. Even small efforts can provide valuable insights. If your idea doesn’t get strong interest, it’s better to adjust it early rather than build something that fails later.
Step 2: Understand Real Hardware Costs
One of the biggest surprises for new hardware founders is how quickly costs can escalate. Many people assume that hardware development is mainly about buying components, but in reality, the majority of costs come from design, development, and iteration.
Every stage of the process requires investment. PCB design, firmware development, prototyping, and testing all add up. On top of that, there are hidden costs that are often overlooked in the beginning but become unavoidable later.
Understanding these costs early helps you plan better and avoid running out of budget halfway through your project.
| Category | Description | Estimated Cost (USD) |
|---|---|---|
| Idea Validation | User research, surveys, landing page, ads testing | $50 – $500 |
| PCB Design | Schematic design + PCB layout (simple to complex) | $200 – $2,000 |
| Components | Sensors, microcontrollers, passive components | $50 – $500 |
| Development Boards | Arduino, ESP32, Raspberry Pi (for early prototyping) | $20 – $200 |
| Firmware Development | Coding, debugging, optimization | $500 – $5,000 |
| Prototyping (Hardware) | PCB fabrication + assembly (multiple iterations) | $200 – $1,500 |
| Enclosure Design | CAD design + 3D printing or casing | $100 – $1,000 |
| Testing & Iteration | Functional, stress, and user testing | $200 – $2,000 |
| Power Optimization | Battery testing, efficiency improvements | $100 – $800 |
| Certification | CE, FCC, RoHS (if required for market) | $1,000 – $10,000+ |
| Manufacturing Setup | Tooling, assembly setup, supplier onboarding | $500 – $5,000 |
| Packaging & Branding | Box design, manuals, branding materials | $100 – $1,000 |
| Logistics & Shipping | Shipping prototypes, components, and final units | $100 – $1,500 |
What Impacts Your Budget
- Complexity of your circuit and PCB design
- Type and quality of components used
- Time required for firmware development
- Number of prototype iterations needed
In addition to these, you also need to consider logistics and external factors. Shipping delays, component shortages, and certification requirements can all increase your expenses.
A smart approach is to always keep a buffer in your budget. Unexpected problems are part of hardware development, and having extra resources allows you to handle them without stress.
Step 3: Choose the Right Technology
Choosing the right technology is not about picking the most advanced option—it’s about choosing what fits your product best. Many beginners make the mistake of selecting powerful components or complex systems that they don’t actually need. This increases cost, complexity, and risk without adding real value.
A better approach is to start with your product requirements and work backward. What does your device need to do? How often will it communicate? Does it need to run on battery? Answering these questions helps you make smarter decisions.
Simplicity is often the biggest advantage. A simple, reliable system is easier to build, test, and scale compared to a complex one filled with unnecessary features.

Smart Technology Decisions
- Choose components based on actual use-case requirements
- Prefer low-power solutions for portable devices
- Use widely supported platforms for easier development
- Avoid adding features that are not essential in early stages
Making the right choices here saves you from major redesigns later. It also makes your development process smoother and more predictable.
Step 4: Build a Minimum Viable Prototype (MVP)
A Minimum Viable Prototype is your fastest path from idea to reality. Instead of building a complete product, you create a simplified version that demonstrates your core concept. This approach allows you to test functionality, identify issues, and gather feedback without heavy investment.
The biggest advantage of an MVP is speed. You can move quickly, test your assumptions, and make improvements based on real results. This is far more effective than spending months building a complex product that may not work as expected.
At this stage, perfection is not the goal. Your focus should be on learning and validation. The simpler your prototype, the easier it is to modify and improve.
By using development boards, ready-made modules, and basic enclosures, you can build your MVP faster and at a lower cost. This flexibility allows you to experiment and refine your idea before committing to a final design.
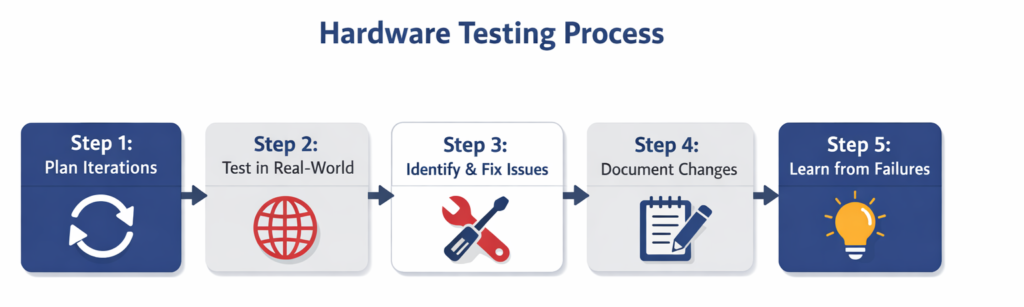
Step 5: Test, Iterate, and Improve
Testing is where your product evolves from a concept into something reliable. No matter how well you design your system, real-world testing will always reveal issues that you didn’t anticipate. These issues are not failures—they are opportunities to improve.
The key is to treat testing as an ongoing process rather than a final step. Each version of your product should go through testing, feedback, and improvement. This cycle helps you refine both functionality and user experience.
Skipping this process is one of the most expensive mistakes you can make. Problems that are easy to fix early become much harder and costlier later.
Focus Areas During Testing
- Verify core functionality works consistently
- Test performance under different conditions
- Observe how users interact with the product
- Identify and fix weak points in the design
Iteration is what turns a basic prototype into a polished product. The more cycles you complete, the stronger your product becomes.
Step 6: Optimize for Power
Power efficiency plays a critical role in the success of many hardware products, especially those that rely on batteries. Users expect devices to last long without frequent charging, and poor battery performance can quickly ruin the user experience.

Optimizing power is not just about selecting the right components—it also involves writing efficient firmware and managing how your device operates over time. Even small inefficiencies can significantly reduce battery life.
This is why power optimization should not be left for later stages. It should be considered early in the design process and tested under real-world conditions.
A well-optimized device not only performs better but also feels more reliable and user-friendly.
Step 7: Prepare for Manufacturing
Preparing a prototype for mass production goes beyond perfecting its lab performance. Manufacturers must focus on scalability, cost efficiency, and reliability, ensuring that every unit can be produced consistently without defects. Early evaluation of supply chains, clear collaboration between design and production teams, and careful verification of components and tolerances are key steps. Thoughtful preparation at this stage reduces costly mistakes, improves product quality, and ensures a smoother transition from prototype to large-scale manufacturing.
Moving from prototype to mass production requires a different level of planning. A design that works perfectly in a lab may not perform well when scaled up, and many products encounter unexpected challenges at this stage.
Manufacturing demands consistency, scalability, and cost efficiency. Even minor design flaws can cause significant issues when producing thousands of units. Clear communication between design and manufacturing teams is crucial to prevent defects, delays, or higher costs. Evaluating your supply chain early is also essential, as component shortages or unreliable vendors can disrupt the production timeline.
Key Preparations Before Production
- Finalize your PCB design and layout
- Ensure all components are readily available
- Verify manufacturing tolerances and constraints
- Choose reliable manufacturing partners
Taking the time to prepare carefully helps avoid costly mistakes, improve product quality, and ensures a smooth transition to large-scale production.
Preparing a prototype for mass production goes beyond perfecting its lab performance. Manufacturers must focus on scalability, cost efficiency, and reliability, ensuring that every unit can be produced consistently without defects. Early evaluation of supply chains, clear collaboration between design and production teams, and careful verification of components and tolerances are key steps. Thoughtful preparation at this stage reduces costly mistakes, improves product quality, and ensures a smoother transition from prototype to large-scale manufacturing.
Careful attention to the mechanical and electronic design ensures that the product is not only functional but also user-friendly and durable. Simple adjustments during the preparation phase, such as improving enclosure design or thermal management, can save significant time and cost later.
Engaging with trusted manufacturing partners early allows teams to identify potential production bottlenecks and optimize workflows. This proactive approach minimizes delays, ensures material availability, and helps maintain high standards of quality throughout the manufacturing process.
Step 8: Launch Strategy
Launching your product is not just about finishing development—it’s about introducing it to the market in a smart, structured, and controlled way. A rushed launch can expose weaknesses, create negative first impressions, and even harm your brand reputation. On the other hand, a well-planned launch gives you the opportunity to refine your product, understand your audience, and set the stage for long-term success.
Start Small and Learn
Instead of aiming for a massive launch from day one, consider releasing your product to a small group of early users or beta testers. This allows you to:
- Collect real-world feedback on functionality, usability, and design
- Identify and fix issues that might have been missed during testing
- Understand user behavior and how they interact with your product
- Refine features and messaging based on actual usage
This approach reduces risk and gives you valuable insights that can prevent larger-scale failures later.

Build Your Launch Plan
A smart launch strategy involves more than just releasing a product. It’s about creating momentum and credibility. Key steps include:
- Define your target audience clearly so you know who will benefit most.
- Craft clear messaging that communicates your product’s value.
- Set measurable goals for engagement, adoption, and feedback.
- Prepare marketing channels such as social media, email campaigns, and press outreach.
- Leverage influencers or early adopters who can amplify your product to a wider audience.
Continuous Improvement
Even after the initial launch, your work isn’t done. Monitor performance metrics, customer satisfaction, and feedback closely. Use this information to iterate quickly, improve features, and build trust. A thoughtful launch not only positions your product for success but also strengthens your brand, encourages loyalty, and ensures readiness for wider adoption.
By combining careful planning, early testing, and ongoing refinement, your launch becomes a powerful step toward establishing your product in the market and creating long-term impact.
Key Takeaways
Building a successful hardware product is not about speed or unnecessary complexity—it’s about making smart, strategic decisions at every stage of development. From initial idea validation to final product launch, each step plays a critical role in determining your success in today’s competitive market.
Many hardware startups fail not because of poor ideas, but due to lack of planning, overengineering, and ignoring real user needs. That’s why it’s essential to focus on solving a genuine problem rather than adding too many features. A simple, well-designed product often performs better than a complex one that is difficult to use or manufacture.
Start by validating your idea through market research and user feedback. Choose the right components and technologies that balance cost, performance, and scalability. Build prototypes early, test frequently, and refine your design based on real-world insights.
By continuously improving your product, reducing risks, and optimizing costs, you can avoid common mistakes in hardware development. With the right strategy, clear focus, and iterative approach, you can successfully build a reliable, scalable, and market-ready hardware product that delivers real value.
Need Help?
Hardware development can be challenging, but the right approach makes it manageable. Whether you are just starting or already working on a prototype, structured guidance can save time, reduce costs, and improve results.
With the right process and decisions, turning your idea into a real, working product becomes much more achievable.