
1. What Is the Cost of Prototyping a Product?
The cost of prototyping a product can range from a few hundred dollars for a basic proof of concept to tens of thousands of dollars for a complex, functional hardware prototype. The final amount depends on what the prototype needs to demonstrate, the engineering work involved, the materials and manufacturing methods selected, and the number of design changes required. A simple 3D-printed model used to check dimensions involves considerably less work than an electronic device with a custom printed circuit board (PCB), sensors, firmware, wireless connectivity, and a finished enclosure. Before estimating the budget, it is important to understand what the prototype must prove and which activities are necessary to achieve that objective.
The cost of prototyping a product can include product design, mechanical engineering, PCB layout, component selection, firmware development, fabrication, assembly, integration, testing, and shipping. Some projects require only a few of these activities, while others need several engineering disciplines working together. Published supplier guides provide useful starting points for understanding these differences. For example, RMA Engineering’s prototype cost guide discusses different prototype stages, while Analogy Design’s prototype cost guide explores how development requirements can influence pricing. These published estimates are useful for preliminary planning, but they should not be treated as guaranteed prices or universal market averages.
| Prototype Type | Indicative Budget | Main Purpose |
|---|---|---|
| Proof of concept | $100–$2,000 | Check whether the core technical idea works |
| Appearance prototype | $300–$5,000 | Evaluate shape, size, ergonomics, and visual design |
| Functional prototype | $2,000–$20,000 | Test the main mechanical or electronic functions |
| Alpha prototype | $15,000–$40,000 | Integrate and evaluate the main product features |
| Production-intent prototype | $5,000–$30,000+ per round in one published guide | Evaluate manufacturing methods, assembly, and production readiness |
These ranges overlap because providers may define prototype stages differently and include different amounts of engineering, fabrication, testing, and design iteration. A complex connected product may need several builds, while a simple mechanical component could require only one or two. Therefore, the cost of prototyping a product should be estimated according to its specific requirements rather than a single figure taken from a general guide. The most useful question is not simply how much a prototype costs, but what the prototype needs to demonstrate. Once that objective is clear, you can choose the appropriate development stage, avoid unnecessary features, and obtain more comparable supplier quotations.
For a broader view of development expenses beyond prototyping, read PrototypeGuru’s guide to the real cost of building a hardware product.
2. Product Prototype Costs by Type
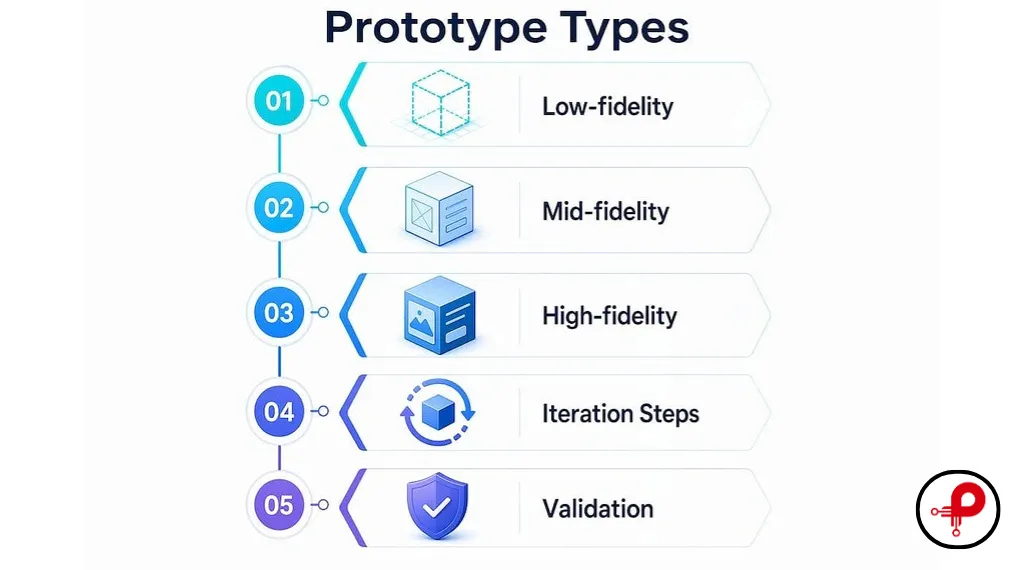
Different prototype types answer different questions during product development, so the right choice depends on the biggest uncertainty you need to resolve. A proof of concept may be enough to verify a technical idea, while a functional prototype is more appropriate when you need to confirm that electronics, firmware, and mechanical components work together. Understanding these differences helps you control the cost of prototyping a product because you can invest in the tests that matter before paying for a more advanced build. Moving directly to a finished-looking product without validating its basic functions may increase expenses without providing much additional value.
Proof of concept and appearance prototypes
A proof of concept (POC) determines whether a central technical idea is feasible. It may use an existing development board, off-the-shelf sensors, basic wiring, or a simple mechanical assembly rather than custom hardware. For example, a team developing a smart temperature monitor could connect a temperature sensor to a microcontroller and verify its readings before investing in PCB design or enclosure fabrication. This approach helps identify technical limitations early and reduces the risk of spending money on a design that does not work as expected.
An appearance prototype serves a different purpose: it helps evaluate the product’s shape, dimensions, surface finish, and ergonomics. Common methods include 3D printing, CNC machining, and other low-volume fabrication processes. An electronic device’s casing could be printed to check button placement, hand comfort, and the space available for internal components before integrating the working electronics. Because the model may not contain functional hardware, its development requirements can be simpler than those of a complete electronic prototype.
Functional prototypes
A functional prototype demonstrates that the product performs its intended tasks. Depending on the design, it may include a custom PCB, sensors, connectors, microcontrollers, batteries, power-management circuits, embedded firmware, and mechanical assemblies. The electronics prototype cost can increase at this stage because engineers must integrate and debug the different subsystems instead of testing them separately. They may discover that a sensor produces unreliable readings, the battery cannot supply enough power, wireless communication is inconsistent, or the enclosure does not provide sufficient room for the components. Resolving these issues can require additional engineering, replacement parts, PCB revisions, and further testing.
For hardware startups, this stage is especially important because it demonstrates whether the proposed design works beyond drawings, simulations, or basic demonstrations. The cost of prototyping a product at this stage depends on the number of functions that must work together and the reliability expected from the build. A simple device with a few components may require relatively little integration, while a connected product with several sensors, wireless features, and embedded software can involve considerably more debugging.
Alpha and production-intent prototypes
An alpha prototype combines the important product features into a more complete system, allowing the team to evaluate functionality, integration, and physical design together. It may still require improvements to the enclosure, electronics, or firmware, but it provides a more realistic view of how the product behaves as a whole. A production-intent prototype goes further by using materials, tolerances, components, and manufacturing methods that resemble those planned for the final product. This helps identify assembly problems, manufacturing limitations, and reliability concerns before the company invests heavily in tooling or production.
Not every project needs every stage, and the order can vary according to its technical risks. Each build should nevertheless have a clear objective, documented deliverables, and an agreed number of revisions. When comparing quotations, confirm whether the price covers one physical build or multiple rounds, whether testing is included, and whether the supplier will provide the design files. These details make it easier to understand what the quoted prototype budget actually covers.
3. Factors That Affect the Cost of Prototyping a Product
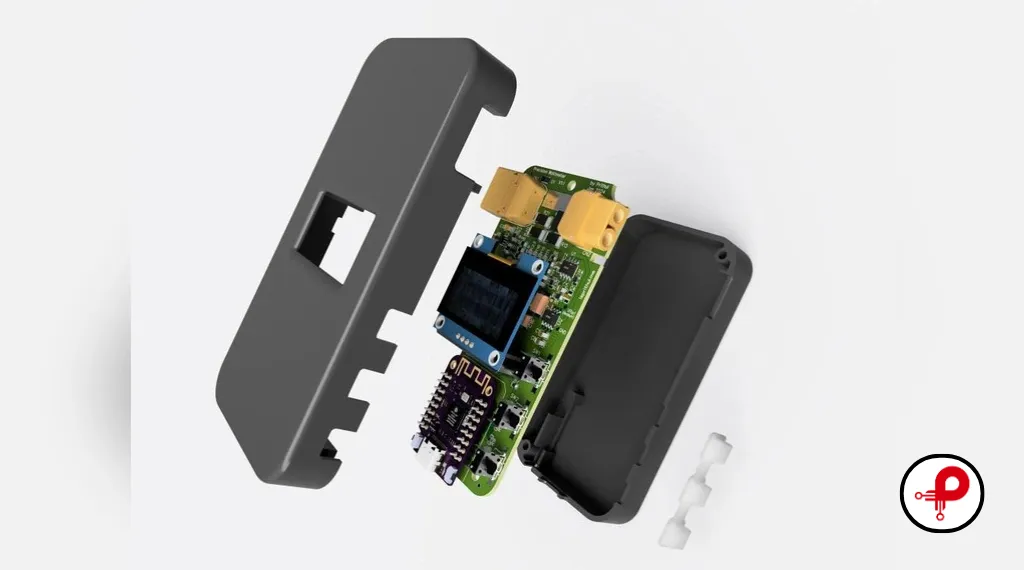
Several factors influence the cost of prototyping a product, and their effect depends on the design requirements and the project’s current stage. Product complexity, engineering time, material selection, electronics, testing, and the number of iterations all contribute to the final amount. Understanding these cost drivers helps you identify where additional investment is necessary and where a simpler approach may provide the same useful information. It also makes supplier quotations easier to compare because two providers may quote different prices for what appears to be the same prototype while including different amounts of engineering, fabrication, and testing.
Product complexity and engineering time
A simple, single-piece object is generally easier to develop than a product containing moving mechanisms, custom electronics, wireless connectivity, tight tolerances, or several interacting subsystems. More complex projects may require mechanical engineers, electrical engineers, firmware developers, and industrial designers to work together, increasing both engineering effort and integration requirements. Depending on the project, the work may include requirements analysis, concept development, CAD modeling, circuit schematics, PCB layout, component selection, embedded software, debugging, and validation.
A project that already has detailed specifications and usable design files may require less engineering time than one that starts with only a rough sketch. Ask suppliers to separate engineering fees from the costs of materials, fabrication, assembly, and testing so you can see where the money is going. A clear project brief also helps reduce misunderstandings that might otherwise lead to additional work and unexpected expenses.
Materials and manufacturing methods
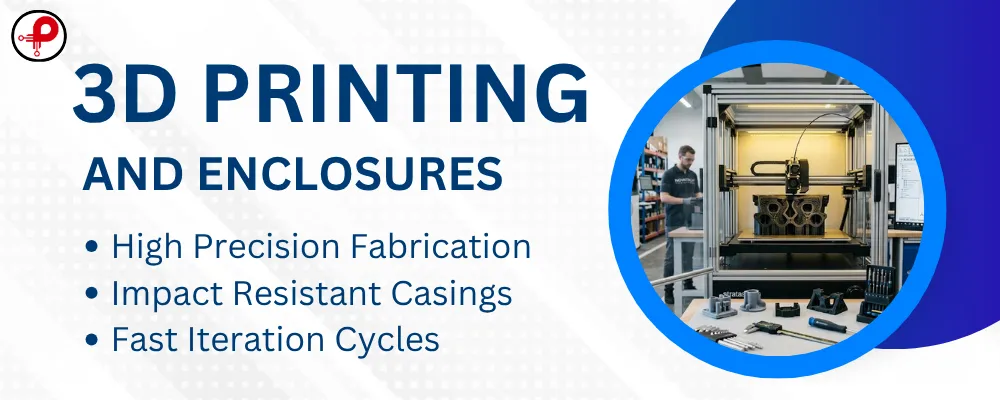
Material selection and fabrication methods affect the prototype’s price, appearance, and performance. A basic 3D-printed plastic enclosure may be sufficient for checking dimensions and component fit, while CNC machining may be more appropriate when you need to evaluate particular material properties, stronger parts, or precise features. The right choice depends on the component’s geometry, material volume, build time, finishing requirements, and the purpose of the test.
Protolabs’ guide to 3D-printing costs explains how factors such as part volume, build time, orientation, supports, and finishing can affect the price of printed components. The cheapest manufacturing method is not necessarily the best option for every stage. When calculating the cost of prototyping a product, choose a process that provides the information you need without paying for material properties or surface finishes that are not yet important.
Electronics, firmware, and design iterations
Electronic hardware can introduce expenses that do not apply to a purely mechanical model. A connected device might require a custom PCB, sensors, connectors, microcontrollers, batteries, wireless modules, and embedded firmware. Existing development boards can help validate basic functions before a custom circuit is designed, but a custom PCB may eventually be necessary to evaluate the intended component layout, dimensions, power circuits, and connectors.
The first build may also reveal problems that were not obvious in drawings or simulations. A connector might not fit, a sensor could be poorly positioned, or the enclosure may need reinforcement. Each revision can add engineering hours, components, fabrication, assembly, and testing. Instead of assuming the first build will be final, include a realistic allowance for design iterations when estimating the cost of prototyping a product.
Timeline, testing, and supplier requirements
A tight schedule can increase expenses through expedited manufacturing, priority shipping, or additional engineering effort. Testing requirements also influence the budget: checking whether two parts fit together is very different from evaluating vibration resistance, operating temperature, battery life, or long-term reliability. The appropriate tests should reflect the product’s intended function and target market rather than include every possible test during an early proof of concept.
Supplier experience, component availability, project location, documentation, shipping, and the number of included revisions can also affect the final quotation. Compare these conditions alongside the total price so you understand which proposal offers the right level of work for your project. A slightly higher quotation may include additional engineering or testing that would otherwise need to be purchased separately.
4. Product Prototype Cost Breakdown
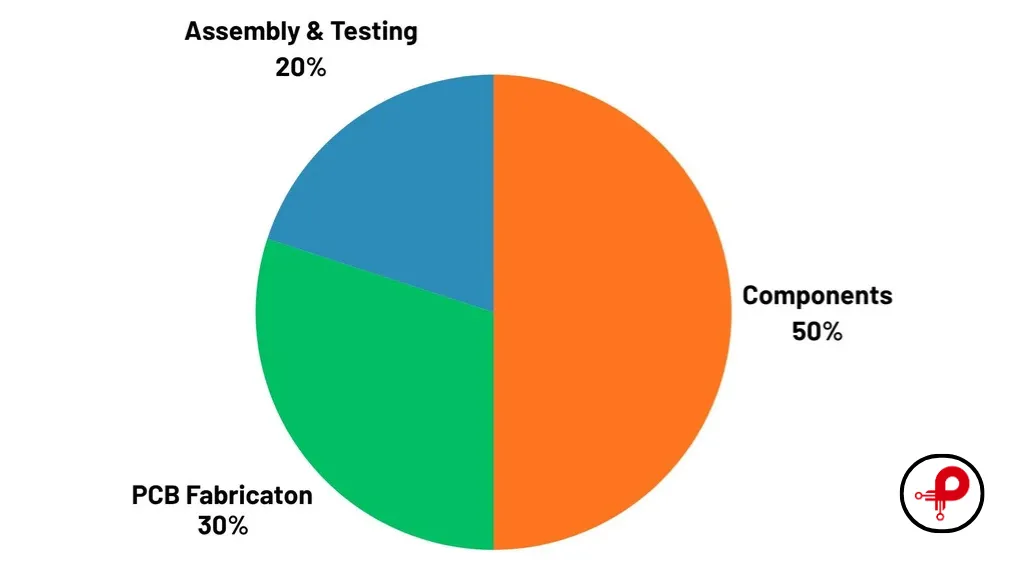
A detailed prototype cost breakdown makes it easier to see where the budget will go and which expenses need to be considered before development begins. Instead of treating the project as a single engineering fee, divide it into design, mechanical work, electronics, components, fabrication, firmware, assembly, testing, and logistics. This approach helps identify missing items, compare suppliers on equal terms, and distinguish one-time design work from expenses that may recur whenever additional prototypes are built.
| Cost Component | What It May Include | What to Confirm |
|---|---|---|
| Product and industrial design | Concept refinement, CAD, dimensions, ergonomics | Are design and source files included? |
| Mechanical engineering | Enclosure, mounting features, mechanisms, tolerances | How many revisions are covered? |
| Electronics and PCB design | Schematics, layout, component selection | Are engineering files included? |
| Components and PCB fabrication | Boards, sensors, connectors, microcontrollers, batteries | Are spare parts and replacement boards included? |
| Firmware development | Embedded software, device control, debugging | Which functions and tests are covered? |
| Fabrication and finishing | 3D printing, CNC machining, surface finishing | Which materials and processes are specified? |
| Assembly and integration | Wiring, fitting components, connecting subsystems | Who handles troubleshooting? |
| Testing and validation | Functional checks, reliability testing, documentation | What reports will be delivered? |
| Logistics and contingency | Shipping, applicable duties, budget reserve | Which charges are excluded? |
Design, PCB development, and components
Product and mechanical design translate requirements into a physical structure that can be built, assembled, and tested. Depending on the project, this work may cover dimensions, ergonomics, mounting features, mechanisms, enclosure design, tolerances, and material selection. For electronics, PCB design should be considered separately from board fabrication and assembly because engineering effort and physical manufacturing expenses are different. Costs may also arise from sensors, connectors, batteries, microcontrollers, power-management components, cables, and replacement parts. Component availability and compatibility can affect the design and schedule, while a custom board may need more than one revision before it performs as required.
For additional context, see PrototypeGuru’s guide to PCB design services for startups. When reviewing a quotation, check whether the supplier will provide the schematic, PCB layout files, bill of materials, fabrication files, and other design deliverables that your team needs for future development. These details can affect the long-term usefulness of the work, even when they do not change the initial fabrication price.
Firmware, integration, fabrication, and testing
Firmware determines how the device behaves by reading sensor inputs, managing outputs, controlling power, handling communication, and responding to errors. Integration testing then checks whether the PCB, firmware, battery, enclosure, and other subsystems function together. A board may pass a basic electrical check and still encounter problems when installed in the complete product, which is why the budget should account for system-level testing rather than only individual component checks.
Physical fabrication and assembly may involve printed or machined parts, fasteners, wiring, surface finishing, and functional checks. Other expenses can include shipping, customs charges where applicable, specialist fixtures, extra fabrication rounds, and changes to the project brief. Depending on the product and target market, compliance testing may also be required. Establish the relevant requirements for the specific product rather than assuming every prototype needs every certification.
A simple formula for prototype cost estimation is:
Estimated base cost = Engineering + Parts + Fabrication + Assembly + Testing + Other project costs
Calculate a contingency allowance separately from the base estimate. This reserve helps account for uncertainty, such as unexpected component replacements or another fabrication round, and is not a compulsory fee charged by every supplier. A clear scope and a written list of exclusions make the estimate more reliable and reduce the chance of unplanned expenses during development.
5. A Practical Prototype Budget Example
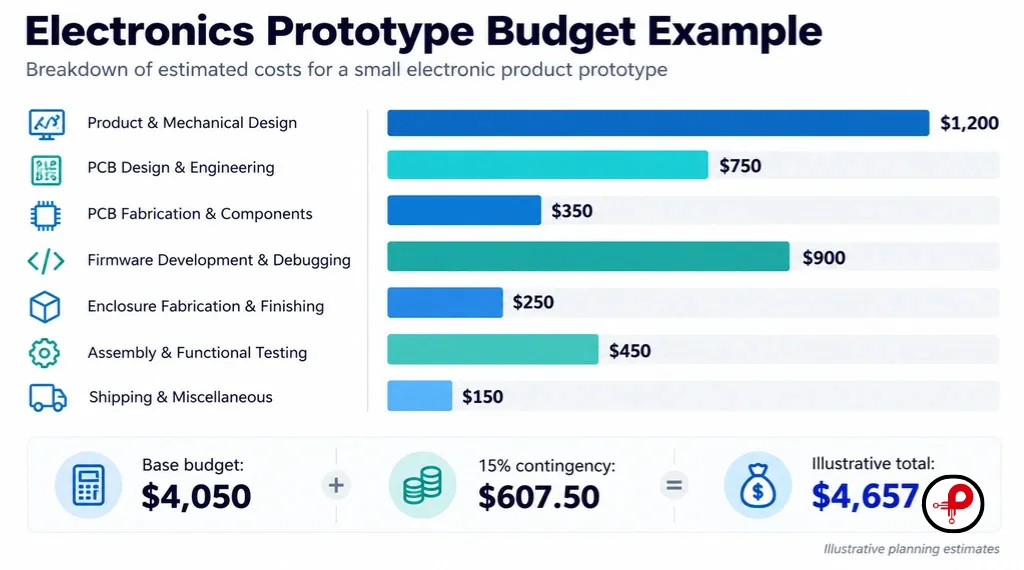
Consider a company developing a small electronic device with a sensor, a custom PCB, basic firmware, and a 3D-printed enclosure. The initial prototype needs to show that the main functions work and that the components fit together correctly; mass production is not yet the objective. In this case, estimating the cost of prototyping a product is easier when the work is divided into individual budget items instead of treating the entire project as one unexplained figure. The amounts below are illustrative planning figures, not a supplier quotation or a verified market average.
| Cost Component | What It May Include | What to Confirm |
|---|---|---|
| Product and industrial design | Concept refinement, CAD, dimensions, ergonomics | Are design and source files included? |
| Mechanical engineering | Enclosure, mounting features, mechanisms, tolerances | How many revisions are covered? |
| Electronics and PCB design | Schematics, layout, component selection | Are engineering files included? |
| Components and PCB fabrication | Boards, sensors, connectors, microcontrollers, batteries | Are spare parts and replacement boards included? |
| Firmware development | Embedded software, device control, debugging | Which functions and tests are covered? |
| Fabrication and finishing | 3D printing, CNC machining, surface finishing | Which materials and processes are specified? |
| Assembly and integration | Wiring, fitting components, connecting subsystems | Who handles troubleshooting? |
| Testing and validation | Functional checks, reliability testing, documentation | What reports will be delivered? |
| Logistics and contingency | Shipping, applicable duties, budget reserve | Which charges are excluded? |
The base estimate is $4,050, and a 15% contingency adds $607.50, resulting in an illustrative total of $4,657.50. This calculation demonstrates how a prototype budget can be organized, but actual costs will depend on engineering rates, PCB complexity, component prices, fabrication methods, testing requirements, and the number of design iterations. The contingency percentage is an example for planning and should be adjusted according to the uncertainty in your own project.
The team might first validate the sensor and firmware with an existing development board, then move to custom PCB design and enclosure development once the basic functions have been demonstrated. This staged approach can prevent unnecessary spending on a refined physical design before the electronics have been proven. It also allows engineers to identify technical problems early, when changes may be easier to implement.
Separate one-time engineering expenses from recurring build costs. Initial CAD or circuit design may be paid for during a particular development phase, while replacement boards, components, fabrication, and assembly can generate costs every time another prototype is produced. Engineering costs can also recur if major design changes are needed. Before approving a quotation, confirm the deliverables, number of builds and revisions, materials, tests, documentation, exclusions, and ownership of design files. Obtaining two or three itemized quotations based on the same project brief makes the comparison more meaningful and helps you understand exactly what is included.
6. Prototype Cost vs. Manufacturing Cost
The cost of prototyping a product and the cost of manufacturing the finished item relate to different stages of development. Prototype work may include concept refinement, engineering, one-off fabrication, assembly, debugging, and validation, with these expenses spread across a small number of units. That is one reason the cost per prototype can be relatively high even when its materials are inexpensive. Manufacturing, on the other hand, focuses on producing repeatable units and may include materials, purchased components, assembly labour, production testing, packaging, factory overhead, and tooling where necessary.
| Factor | Prototype Development | Manufacturing |
|---|---|---|
| Main objective | Validate design and functionality | Produce repeatable units |
| Engineering | Often concentrated in early development | Focused on production and improvement |
| Fabrication | Flexible methods suited to testing | Methods selected for volume and consistency |
| Tooling | May be avoided in early builds | May be required for the chosen process |
| Unit cost | Often high for one-off builds | May fall as volume increases |
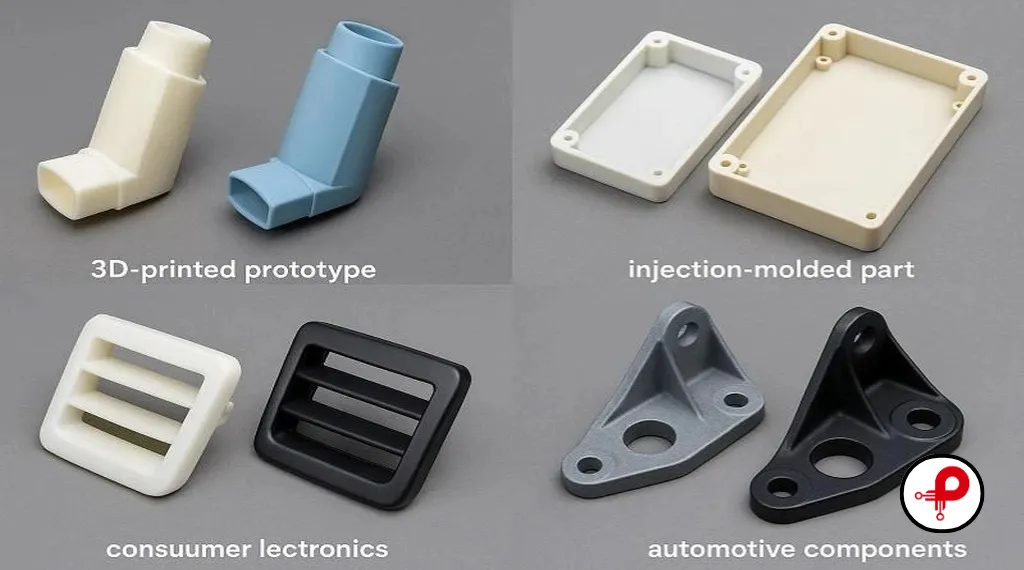
For example, a 3D-printed enclosure might be suitable for checking dimensions and internal component fit during early development. If the final design uses injection moulding, the project may later need mould design, tooling, process development, and further validation. Higher production volumes can spread certain fixed costs across more units, but lower unit costs are not guaranteed because tooling, inventory, quality control, and working capital can all increase the overall investment.
For this reason, a prototype quotation should not be treated as the expected manufacturing price per unit. Prototyping helps validate and improve the design, while manufacturing establishes how the product can be produced consistently. When estimating the cost of prototyping a product, consider how the early design decisions may affect future production without investing in tooling before it is needed. For a broader overview of development and production expenses, read The Real Cost of Building a Hardware Product.
7. How to Reduce the Cost of Prototyping a Product
Reducing development expenses does not simply mean choosing the cheapest material or supplier. A more effective approach is to spend money on the questions that matter at the current stage and avoid unnecessary engineering, fabrication, and design changes. Begin with a clear project brief that explains what the product should do, who will use it, which features are essential, and what the prototype needs to demonstrate. Include dimensions, limitations, sketches, reference images, and any existing design files so the supplier can understand the requirements and prepare a realistic quotation.
Build only what you need to test. If the immediate objective is to verify sensor readings, an existing development board may be sufficient; if you need to evaluate ergonomics, a simple physical model could provide the required information without working electronics. Standard connectors, off-the-shelf sensors, and suitable components already available to the team can help validate a concept before custom parts are developed. However, shortcuts should not be used when they prevent a meaningful test of the final design. The aim is to avoid premature spending while still collecting reliable information about the product.
The manufacturing method also matters. 3D printing may be appropriate for initial fit checks, while CNC machining can be useful when particular material properties or precise features need to be assessed. Consider part geometry, build time, finishing requirements, and the purpose of each test before selecting a process. Protolabs’ 3D-printing cost guide provides further guidance on how design decisions can influence part costs. Plan prototype rounds around specific test objectives, record the results, and focus revisions on the problems actually identified instead of redesigning the whole product after every test. Each build should provide useful information that helps the team decide what to change next.
Finally, compare two or three detailed supplier quotations based on the same brief. Look beyond the total price and assess engineering effort, deliverables, included revisions, materials, testing, timelines, documentation, and ownership of design files. You do not necessarily need production tooling or premium finishes during the earliest stages, but it is sensible to consider eventual assembly and manufacturing constraints before the design becomes difficult or expensive to change. The most effective way to control the cost of prototyping a product is to match the complexity of each build to its purpose while keeping future manufacturing requirements in mind.
8. Frequently Asked Questions About the Cost of Prototyping a Product
1. How much does it cost to prototype a product?
↑2. What is the cost of prototyping a product with electronics?
↓3. What should a prototype cost breakdown include?
↓4. How do you estimate the cost of prototyping a product?
↓5. Is prototype cost the same as manufacturing cost?
↓6. Can I build a prototype at home to save money?
↓7. How can I lower prototype development costs?
↓8. When should a prototype move to production?
↓Conclusion
The cost of prototyping a product depends on what the prototype must demonstrate, the engineering work involved, the materials and manufacturing methods selected, and the number of iterations required. A clearly defined scope and a realistic budget help you make informed decisions before committing to development. For electronic and hardware products, PCB design, component selection, firmware, physical fabrication, assembly, and testing should be considered as distinct parts of the project rather than combined into one unexplained figure.
PrototypeGuru helps businesses understand the engineering and development steps involved in turning product ideas into practical hardware solutions. By selecting the right prototype stage and planning expenses carefully, you can reduce avoidable costs and build a stronger foundation for manufacturing. For a broader look at the investment involved in taking a product from concept toward market, read the real cost of building a hardware product.