








Espressif provides an add-on package that lets you program ESP32 boards directly from the Arduino IDE. The key to getting it working is entering the right ESP32 URL for Arduino IDE in the Boards Manager settings — once that’s in place, installing and using the ESP32 board is quick. This guide walks you through the full setup, from adding the ESP32 board manager URL to running your first test sketch, no matter which desktop operating system you’re on.
Using Arduino IDE 2.x? The steps for entering the ESP32 URL in Arduino IDE 2.0 are slightly different — look for a guide specific to that version if that’s what you have installed.
Watch the Video Tutorial
Follow this guide in two ways: watch the video tutorial below or continue reading the step-by-step written instructions on this page.
Prerequisites: Arduino IDE Installed
Before you can use the ESP32 URL for Arduino IDE, you’ll need the Arduino IDE itself already installed. Two major versions are available for download:
Grab the installer from the official site: arduino.cc/en/Main/Software
A note on which version to pick: Some community plugins for the ESP32 — most notably the SPIFFS Filesystem Uploader — haven’t been ported to Arduino IDE 2.x yet. If you think you’ll need SPIFFS uploading down the line, it’s safer to stick with the older 1.8.x branch (scroll down on the downloads page to find it). Nothing stops you from having both versions on the same machine, so you can always add 1.8.x later if you decide you need the plugin.
You’ll also need an ESP32 development board on hand before you can test anything.
Installing ESP32 Add-on in Arduino IDE
This is where the ESP32 URL for Arduino IDE actually comes into play. Follow these steps in order:
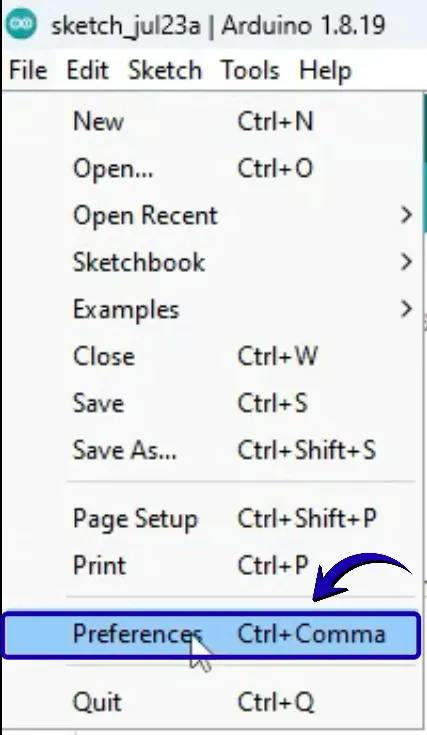
Step 1 — Open the Preferences window
In the Arduino IDE menu bar, go to File > Preferences.
Step 2 — Enter the ESP32 board manager URL
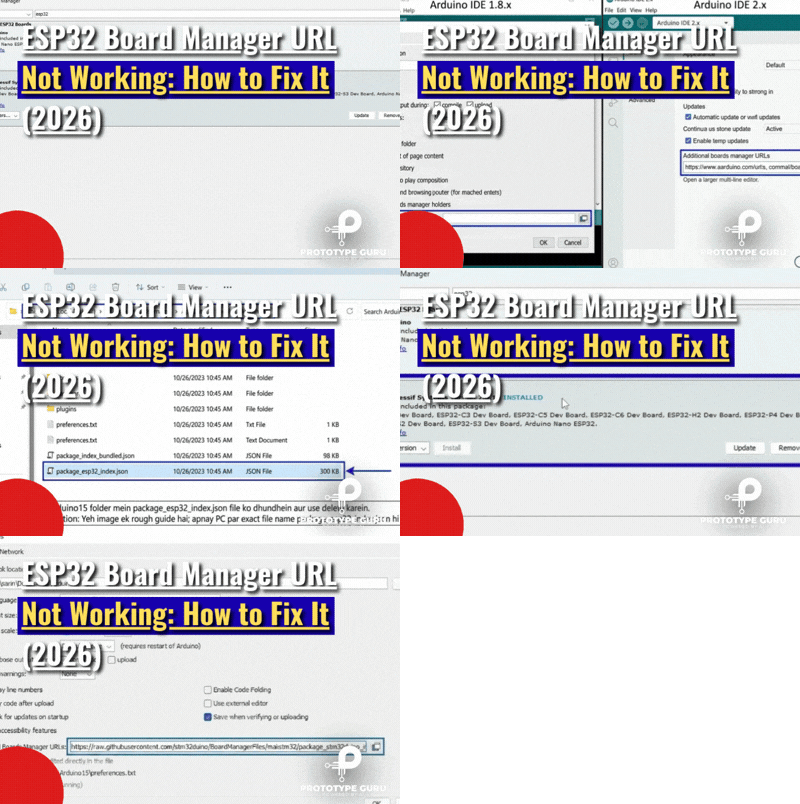
Paste the following ESP32 URL for Arduino IDE into the “Additional Board Manager URLs” field:
https://raw.githubusercontent.com/espressif/arduino-esp32/gh-pages/package_esp32_index.json
Click OK to save. This single URL is what tells the Arduino IDE where to find the ESP32 board package.
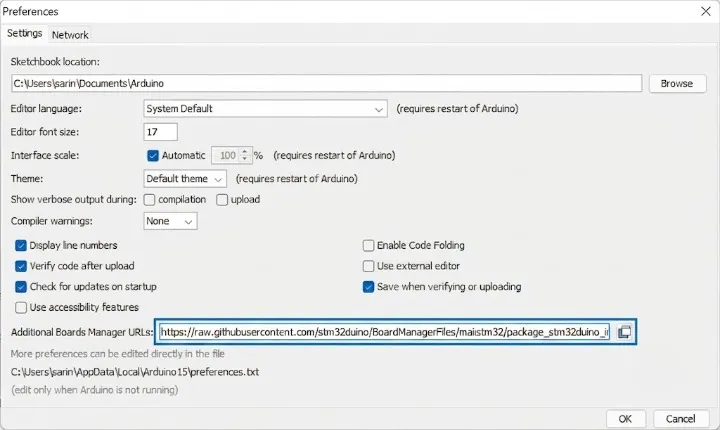
Already have the ESP8266 URL in that field? No problem — you can list both the ESP32 Arduino IDE URL and the ESP8266 URL together, separated by a comma:
https://raw.githubusercontent.com/espressif/arduino-esp32/gh-pages/package_esp32_index.json, http://arduino.esp8266.com/stable/package_esp8266com_index.json
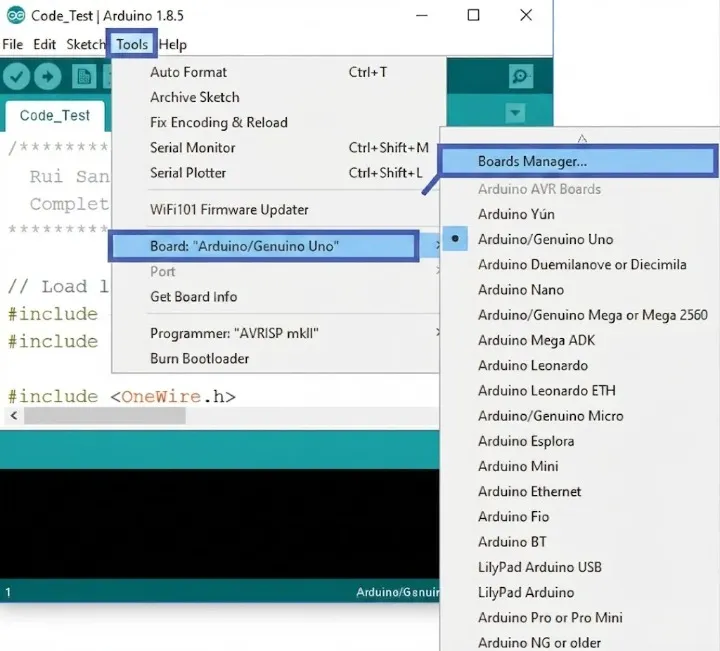
Step 3 — Launch the Boards Manager
Navigate to Tools > Board > Boards Manager…
Step 4 — Find and install the ESP32 package
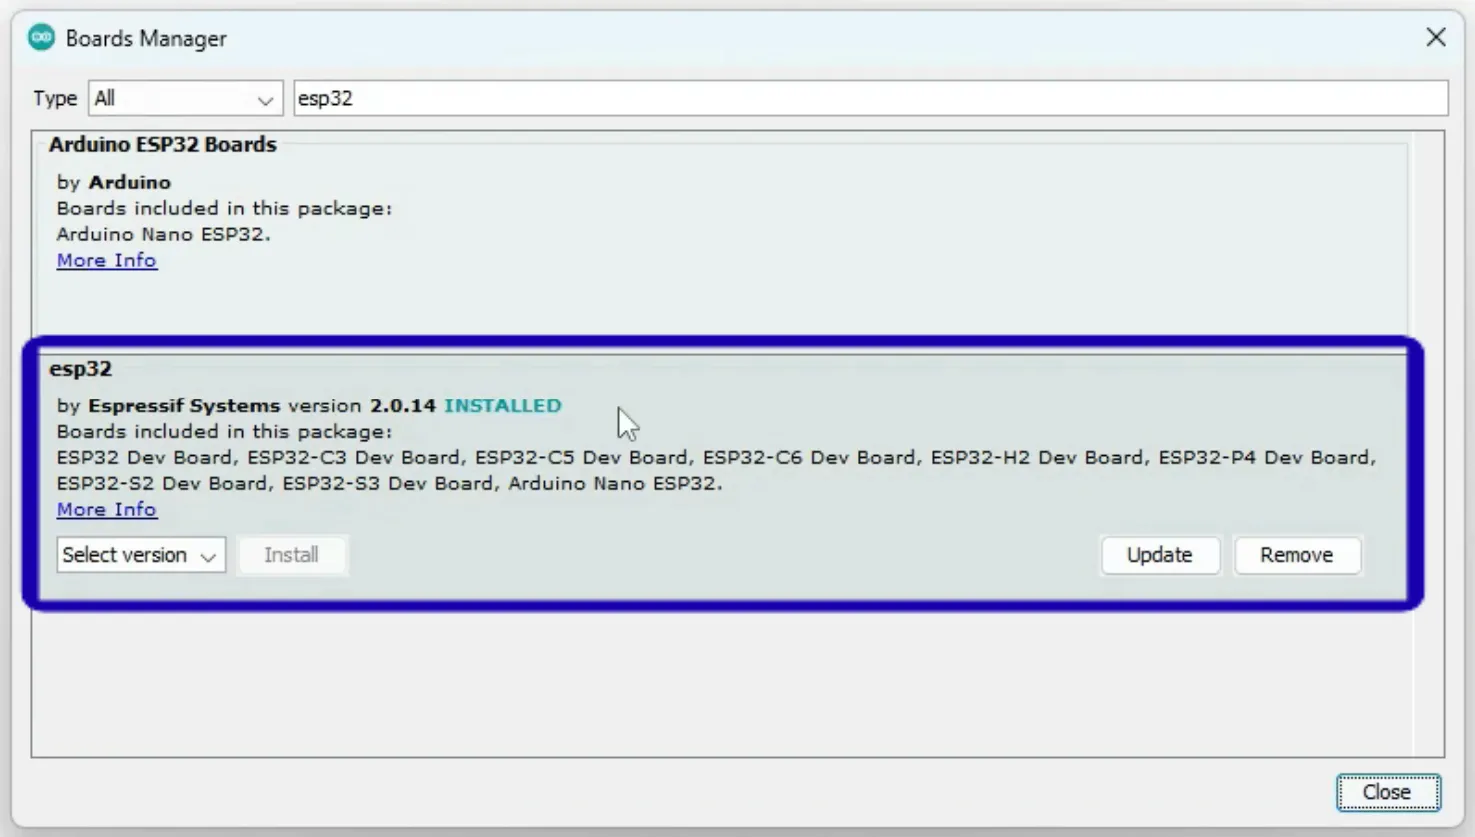
Type “ESP32” into the search bar and click Install next to the entry called “ESP32 by Espressif Systems.” Once the ESP32 URL for the Arduino IDE has been added correctly, this package should appear right away.
Installation typically finishes within a minute or so.
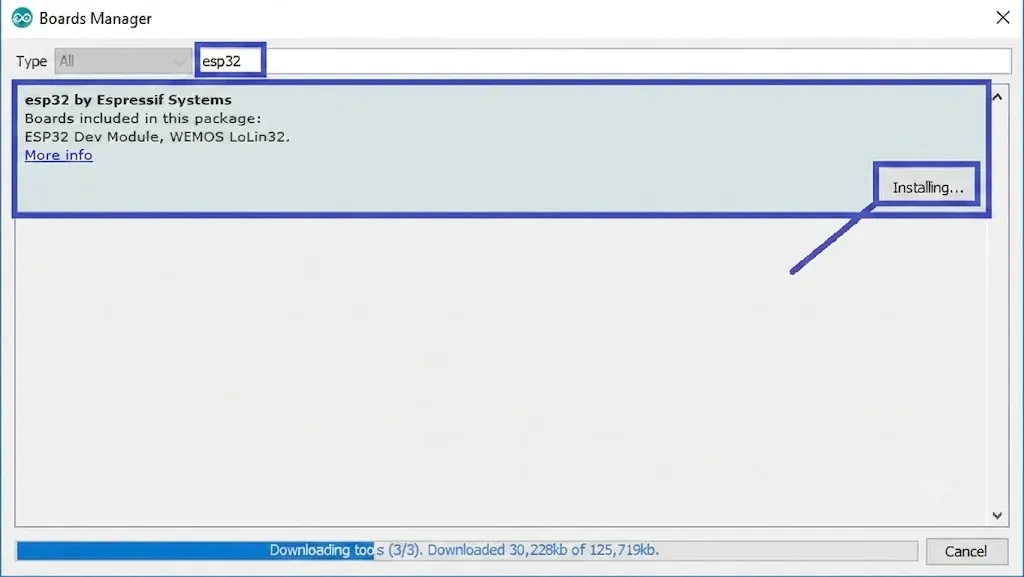
Step 4 — That’s it. It should be installed after a few seconds.
Troubleshooting
Problem: “Failed to connect to ESP32: Timed out… Connecting…”
This means the board isn’t in flashing mode when the IDE tries to upload — it’s not related to the ESP32 URL for Arduino IDE itself, but it’s the most common snag after setup. With the correct board and port already selected:
- Press and hold the BOOT button on the ESP32.
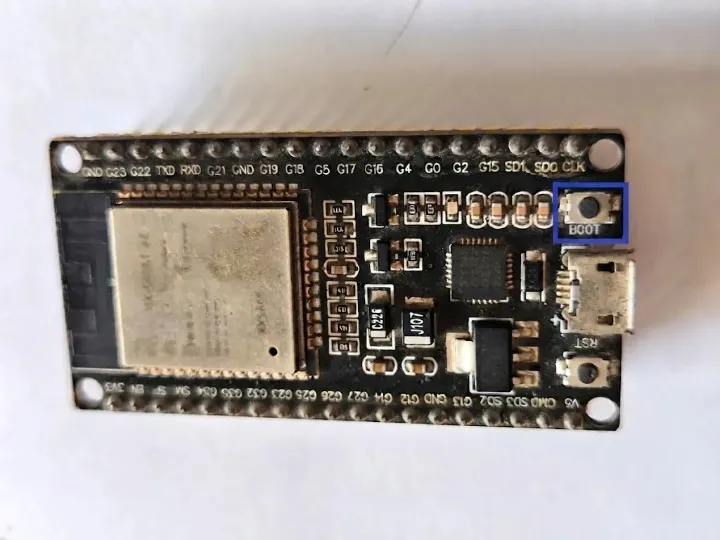
2.Click the Upload button in the Arduino IDE.

3. When “Connecting…” appears, release the BOOT button.
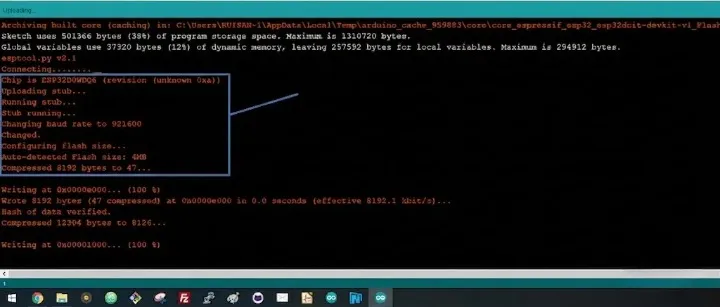
4. Wait for the “Done Uploading” message to confirm the upload was successful.
Keep in mind you’ll need to repeat this button-press routine on every future upload unless you apply a permanent fix — search for guidance on resolving the timeout issue without manual button presses if this gets tedious. Press the EN button afterward to reboot the board and start running your new sketch.
Problem: Serial port doesn’t appear / “COM Port not found”
This usually points to a missing driver, not an issue with the ESP32 board manager URL. Install the CP210x USB-to-UART Bridge driver for your operating system (separate downloads exist for Windows and macOS), then reconnect the board.
Wrapping Up
With the correct ESP32 URL for Arduino IDE entered and a test sketch running successfully, your Arduino IDE is fully set up for ESP32 development on Windows, macOS, or Linux. From here, you’re ready to start building your own connected projects.