1. What Is IoT Prototyping?
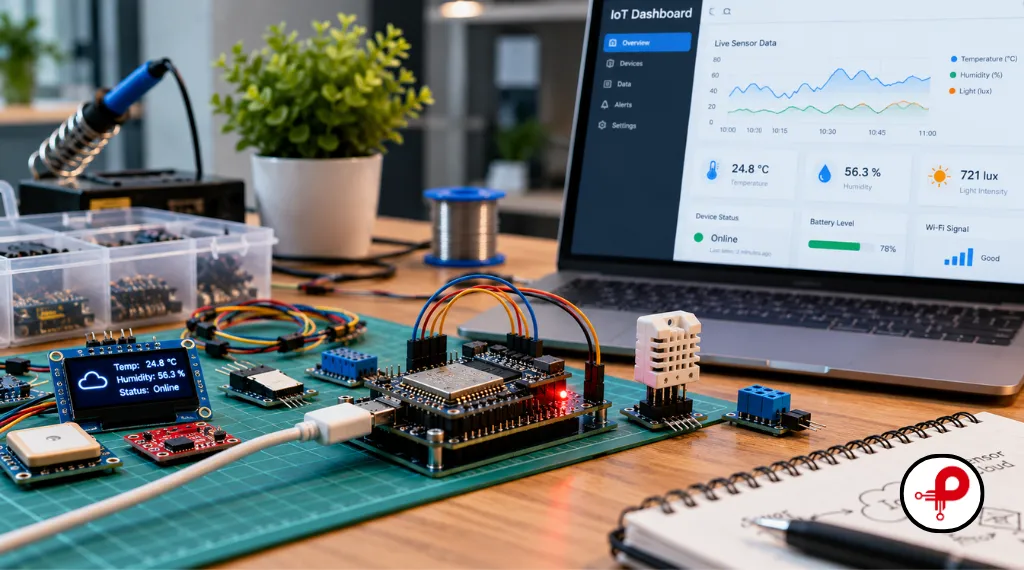
Building a connected product involves more than connecting a sensor to a microcontroller and sending data over Wi-Fi. A successful Internet of Things (IoT) device must collect accurate information, communicate reliably, manage its power consumption, protect sensitive data, and deliver useful results.
IoT prototyping is the process of turning a connected-device concept into a working model that can be tested before committing to a final product design. It allows engineers and product teams to evaluate hardware, firmware, connectivity, software integration, and user experience while changes are still manageable.
Consider a company developing a remote temperature-monitoring device. The first prototype might use a development board and temperature sensor to verify measurements and data transmission. Later versions can evaluate battery life, network reliability, enclosure design, and performance under real operating conditions.
According to the broader Internet of Things overview from IBM, IoT connects physical devices that use sensors, software, and network connectivity to collect and exchange information. Prototyping helps teams determine whether the individual components can work together effectively.
What does an IoT prototype include?
The components depend on the project’s purpose, technical requirements, and stage of development. An early experiment may require only a controller and sensor, while a more complete prototype could include the following elements:
- A microcontroller or embedded computing platform.
- Sensors or actuators that interact with the physical environment.
- A communication module or built-in wireless interface.
- Firmware for collecting, processing, and transmitting data.
- A cloud service, database, dashboard, or mobile application.
- A battery or power-management circuit.
- A development board, prototype PCB, or early mechanical enclosure.
Not every project needs all these components immediately. For example, a sensor-validation prototype can establish measurement accuracy before cloud development begins. A connected-device demonstration, however, may also require a basic dashboard to show whether information reaches its destination.
The most effective prototype is not necessarily the most sophisticated one. It is the simplest working model that can answer the project’s most important technical questions and provide reliable evidence for the next development decision.
Prototype vs. proof of concept vs. MVP
These terms are sometimes used interchangeably, but they describe different development objectives. Understanding their differences helps teams decide what to build and when to invest in additional features.
| Development stage | Main objective | Typical output |
|---|---|---|
| Proof of concept (PoC) | Verify whether a technical idea is feasible | A simple demonstration of a critical function |
| Functional prototype | Test the interaction between hardware, firmware, and software | A working device with core features |
| Minimum viable product (MVP) | Evaluate the product’s value with intended users | A limited product experience suitable for controlled validation |
| Production-ready product | Prepare a design for repeatable manufacturing and operation | A validated design supported by documentation and testing |
A proof of concept might demonstrate that a temperature sensor can transmit readings wirelessly. A functional prototype would go further by checking data accuracy, network recovery, power consumption, and the complete user experience.
A working prototype does not automatically qualify as an MVP or production-ready product. Reliability, security, usability, manufacturing requirements, and ongoing maintenance must also be considered as the design progresses.
2. Why Is IoT Prototyping Important?
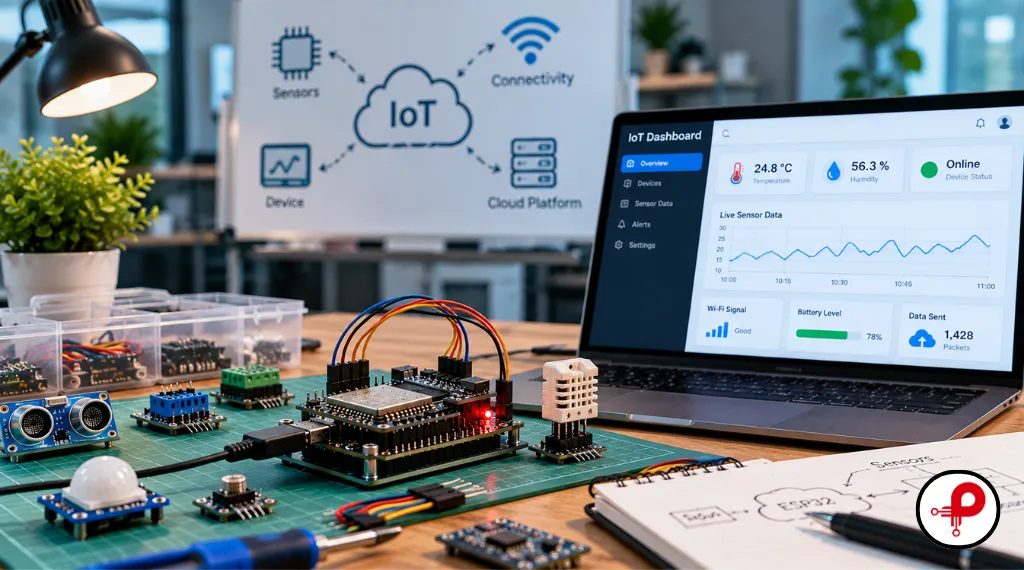
The main benefit of prototyping is that it reduces uncertainty before major engineering, software, and manufacturing investments become difficult to reverse. Testing assumptions early helps teams identify technical limitations and make informed design decisions.
Validate technical feasibility early
A proposed device might need to measure small temperature changes, communicate through thick walls, or operate on a battery for several months. These requirements should be tested rather than accepted solely because a component datasheet suggests they are achievable.
An early prototype can reveal problems with sensor accuracy, wireless range, processing capacity, interference, and power consumption. Engineers can then investigate alternatives before committing to a custom circuit board or enclosure.
Test the complete system
Individual components may work correctly while the complete IoT system still fails. A sensor could produce accurate readings, for example, while the firmware sends incorrect units or the dashboard displays an outdated timestamp.
Testing the complete data flow helps expose integration problems between hardware, firmware, communication networks, and software. This is particularly important when multiple components are developed separately or depend on different communication interfaces.
Improve component and design decisions
Prototyping gives engineers practical evidence for choosing controllers, sensors, wireless technologies, batteries, and other components. Rather than selecting hardware based only on theoretical specifications, the team can evaluate its behaviour in the intended application.
For example, a project using an ESP32-based platform should consider the required interfaces, processing capacity, wireless capabilities, software support, and power characteristics. The ESP32 selection guide can help when comparing suitable development options.
Reduce expensive redesigns
A problem discovered during an early bench test is usually easier to correct than one identified after a custom PCB has been assembled or a production enclosure has been manufactured. Prototyping cannot eliminate every risk, but it can expose significant issues sooner.
This advantage becomes more important when the product requires specialized sensors, wireless communication, battery operation, custom mechanical parts, or integration with an existing software platform.
Gather feedback from real users
A device may function correctly from an engineering perspective but still be difficult for customers to install, configure, or understand. Users might struggle with network pairing, confusing indicators, battery replacement, or interpreting notifications.
Testing with representative users helps reveal these practical problems before the design becomes fixed. Their feedback can guide improvements to setup instructions, physical controls, enclosure layout, and the associated mobile or web interface.
3. The IoT Prototyping Process: From Idea to Working Device
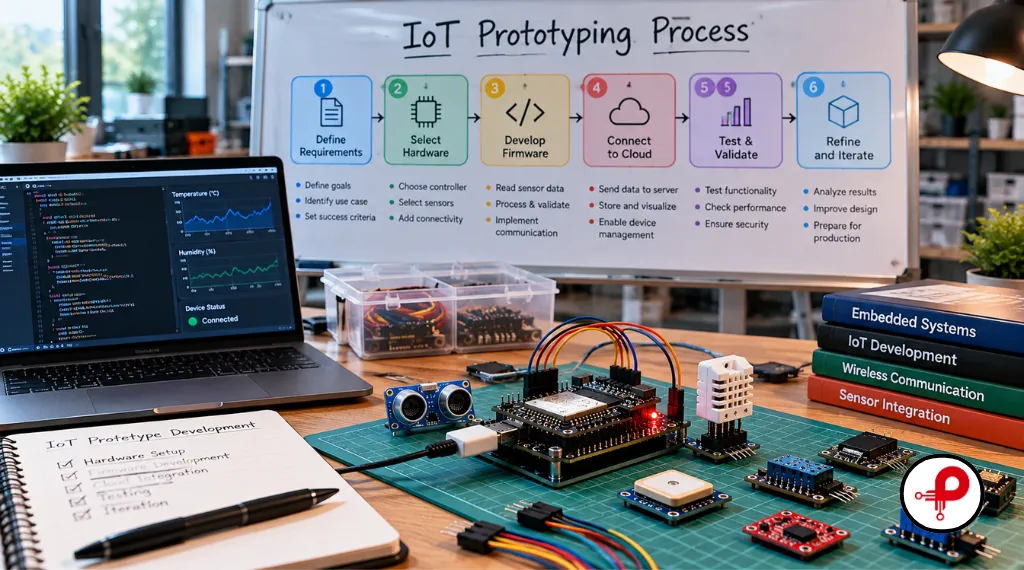
A structured IoT prototyping process turns a broad product idea into a series of manageable engineering tasks. Each stage should have a clear objective, a way to measure progress, and a defined outcome that guides the next decision.
Step 1: Define the problem and success criteria
Begin by describing the problem the connected device must solve. Instead of starting with a list of components, identify the information the device must collect, the actions it should perform, and the conditions under which it must operate.
For an industrial monitoring system, requirements might include measuring vibration, transmitting readings at regular intervals, detecting abnormal values, and recovering after a temporary network outage. Convert these expectations into measurable acceptance criteria wherever practical.
Examples include an agreed measurement tolerance, a maximum reporting delay, a required operating duration, or a defined recovery procedure after connectivity returns. The exact limits should reflect the application rather than arbitrary targets selected before the requirements are understood.
Step 2: Identify the highest-risk assumption
List the areas where the project has the greatest uncertainty. These could include sensor performance, wireless coverage, battery life, installation conditions, environmental exposure, or integration with an existing backend.
Choose an early experiment that addresses the most important uncertainty. If a product depends on detecting a small change in temperature, test the sensor first. If it must operate remotely for months, investigate power consumption and network availability before building a polished dashboard.
This approach prevents teams from spending time on features that do not resolve the main technical risks. It also gives the prototype a clear purpose, making it easier to judge whether the work has produced useful results.
Step 3: Select the hardware and development platform
Choose a controller, sensors, and communication modules according to the requirements established earlier. Check the available interfaces, memory, processing capacity, operating voltage, software support, power characteristics, and expected component availability.
Development boards often provide a convenient starting point because they simplify wiring and initial firmware development. However, confirm that the selected board and modules are suitable for the signals, voltages, environmental conditions, and communication methods required by the project.
Document the chosen components and any important alternatives. This record makes subsequent revisions easier to manage and helps explain why a particular component was selected if performance, availability, or cost becomes a concern.
Step 4: Build a minimum working hardware setup
Connect only the components required to test the first critical function. A basic arrangement might include a controller, sensor, stable power source, and serial connection for debugging.
Verify the sensor output locally before adding wireless communication or cloud integration. Then confirm that the firmware processes the readings correctly and that the communication layer transmits them in the expected format.
Where practical, change one major variable at a time. If the sensor, firmware, wireless configuration, and cloud endpoint are all changed simultaneously, identifying the cause of a failure becomes much harder.
Record the wiring, component versions, firmware revisions, test conditions, and observations. Photographs, a simple block diagram, and brief test notes can provide useful documentation as the prototype becomes more complex.
Step 5: Develop firmware and communication
Firmware should do more than collect a successful reading once. It must gradually account for invalid sensor values, unexpected conditions, network failures, restarts, and missing data as these scenarios become relevant to the application.
Start with basic data collection and validation, then add communication, diagnostics, error handling, and recovery. Define message fields, timestamps, device identifiers, and measurement units so that the receiving system can interpret each message consistently.
A useful development sequence is to test the sensor locally, validate the processed data, establish network connectivity, transmit a structured message, and confirm the result at the receiving end. Each step isolates a different class of potential problem.
Step 6: Connect the prototype to its software environment
A basic cloud service or local server is often sufficient for early integration testing. The objective is to confirm that the receiving system can identify the device, process messages, store relevant information, and present a meaningful result.
Avoid building a large application before the device-to-server connection has been demonstrated. A simple dashboard displaying sensor values, timestamps, and connection status may provide enough information to validate the first version.
As development progresses, consider device provisioning, user configuration, network outages, firmware updates, and access controls. These requirements can affect hardware selection and software architecture, so they should not be postponed until the last stage.
Step 7: Test, document, and refine
Compare the test results with the acceptance criteria established at the beginning. Document which requirements have passed, what has failed, and what remains uncertain before deciding which changes deserve priority.
Some results may suggest firmware improvements, while others may require different sensors, a redesigned PCB, a revised enclosure, or another communication method. Prioritize changes according to their impact on core functionality, safety, reliability, and cost.
The purpose of each prototype iteration is to generate evidence and improve the design. Repeating demonstrations without recording results or investigating failures provides much less value than a structured cycle of testing and refinement.
4. Choosing Hardware and Connectivity for an IoT Prototype
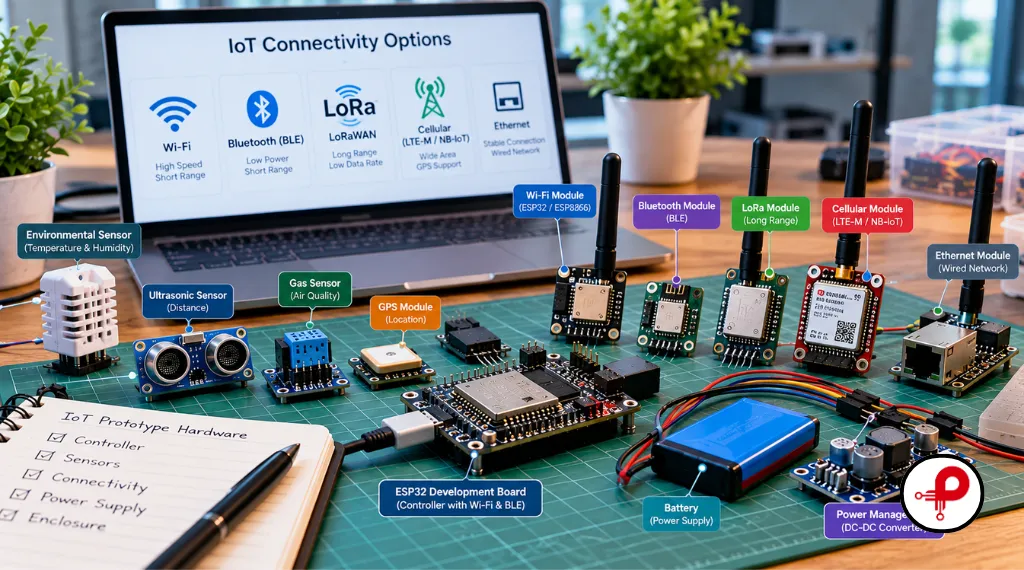
Hardware and connectivity decisions influence device performance, development complexity, battery life, and the design’s suitability for manufacturing. The right selection depends on where the product will operate, what information it must transmit, and how frequently communication is required.
Choosing controllers and sensors
A development board may be ideal for early experimentation without being the right choice for the final product. Evaluate controllers according to processing requirements, memory, interfaces, available software libraries, wireless support, and long-term component availability.
Sensor selection requires similar care. Measurement range, accuracy, response time, calibration requirements, communication interface, and environmental limitations all influence whether a particular component is suitable.
Consider the sensor’s physical installation as well as its electrical specifications. Temperature, vibration, electromagnetic interference, enclosure material, and mounting position can affect actual measurements, particularly when the prototype is moved from the workbench into its intended environment.
Comparing common IoT connectivity options
| Technology | Common applications | Important considerations |
|---|---|---|
| Wi-Fi | Connected appliances and indoor monitoring | Coverage, network setup, and power consumption |
| Bluetooth Low Energy (BLE) | Wearables, configuration, and local sensor communication | Short-range communication and device compatibility |
| LoRaWAN | Remote monitoring with relatively small data messages | Gateway availability, data rate, and coverage |
| Cellular, including LTE-M or NB-IoT where available | Remote monitoring and asset tracking | Network availability, module cost, data plans, and power requirements |
| Ethernet | Fixed devices and industrial installations | Cabling, installation, and physical access |
This comparison is a starting point rather than a universal ranking. Actual range, reliability, data rate, and energy consumption depend on the implementation, surroundings, network infrastructure, and operating conditions.
A soil sensor transmitting a small measurement several times per day has different requirements from a camera sending large volumes of data. Selecting connectivity before understanding the application’s real requirements can increase development costs or lead to unnecessary redesign.
Design around power consumption
Power consumption should be measured throughout development, particularly when the device must run on a battery. A prototype may consume more energy than expected because its radio stays active, its processor never enters sleep mode, or its sensors remain powered continuously.
Measure current during representative operating conditions, including active processing, wireless transmission, idle periods, and sleep states. Battery estimates should also consider the duty cycle, battery characteristics, temperature, and expected network behaviour rather than relying on one short measurement.
The low-power circuit design guide provides relevant background when improving battery life or reducing energy consumption in an embedded device.
When should you move to a custom PCB?
Development boards and jumper wires are useful while requirements are changing. They become less suitable when the design needs a smaller footprint, consistent connectors, better power management, repeatable assembly, or a stable physical layout.
A custom PCB can integrate the controller, sensors, power circuitry, protection components, and connectors into a more representative hardware design. However, designing a PCB too early can make experimentation more expensive if major requirements remain unresolved.
A staged approach usually works best: validate the central functions with development hardware, confirm the important architectural choices, and design a custom board when the available evidence justifies it. The guide to low-cost PCB prototypes explains relevant considerations for early board fabrication.
5. Building the Complete Device-to-Cloud System
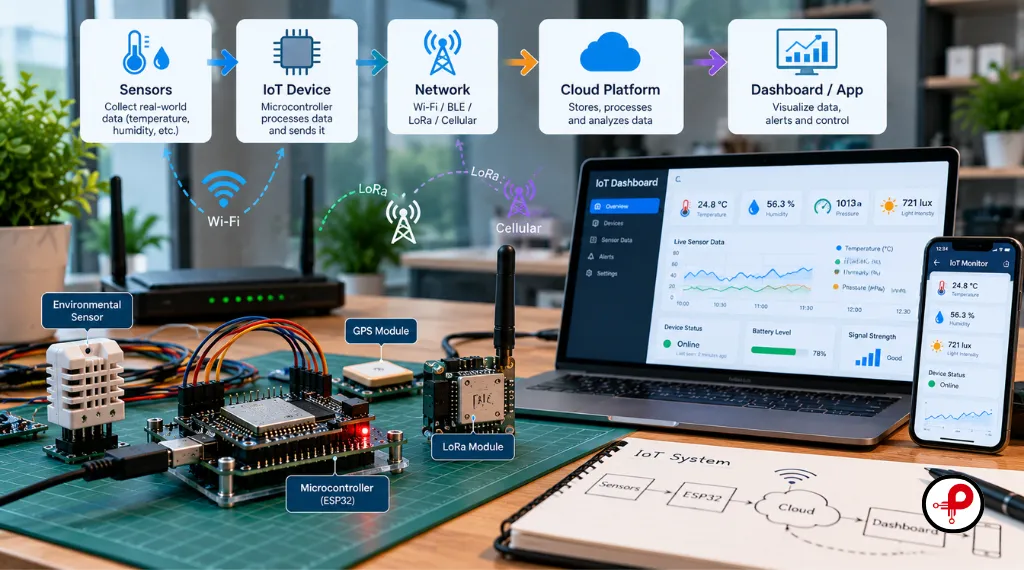
IoT hardware rarely operates in isolation. A connected product needs a system that moves information from the physical environment to the software responsible for storing, interpreting, displaying, or acting on it.
A basic architecture can be represented as:
Sensor or actuator → Embedded firmware → Communication network → Server or cloud platform → Dashboard, notification, or automated action
Some products also use a gateway between the device and the server. Others process data locally so that essential functions can continue when internet connectivity becomes unavailable.
Firmware and data handling
The firmware should define how measurements are collected, validated, timestamped, processed, and transmitted. If the network is unavailable, the device may need to buffer data and transmit it later, depending on the application’s requirements and available memory.
Consider what happens when storage fills up, a sensor stops responding, or the device unexpectedly restarts. Even an early prototype benefits from understandable error states, useful diagnostic information, and recovery behaviour that can be tested consistently.
Communication protocols and message design
Choose a communication protocol according to the system’s requirements instead of selecting one simply because it is familiar. MQTT can suit lightweight messaging and telemetry systems, while HTTP-based APIs may work well for particular integrations. Local device communication may use other protocols entirely.
The important consideration is whether the design handles authentication, message delivery, duplicate messages, disconnections, and recovery appropriately. A protocol choice alone does not guarantee reliable communication or correct system behaviour.
Define the data format consistently across the device and receiving software. A temperature reported in Celsius but interpreted as Fahrenheit, for example, could produce incorrect alerts even when communication appears to work correctly.
Cloud processing and the user interface
The cloud or server layer may receive telemetry, store measurements, evaluate thresholds, generate alerts, and provide information to a web or mobile interface. Early development usually benefits from keeping this layer simple until the essential data path has been verified.
A basic interface might show recent measurements, the device’s connection status, and any abnormal readings. Additional functions, such as advanced analytics, reporting, and user management, can be introduced when their value and requirements become clearer.
For projects needing managed infrastructure, review the capabilities and requirements of a service such as AWS IoT. Consider device identity, provisioning, monitoring, messaging costs, security, and the ongoing effort required to operate the platform.
Also decide what happens when different parts of the system become unavailable. Some applications can wait for a connection to return, while others need local decision-making or a defined safe state because they control equipment or support time-sensitive monitoring.
6. IoT Prototype Cost and Development Timeline
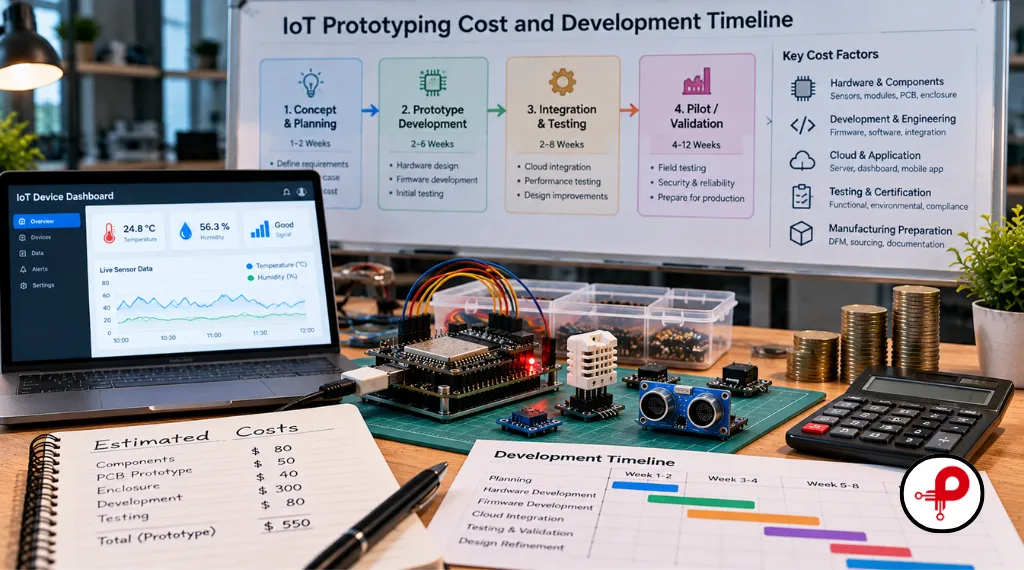
The cost of IoT prototyping depends on the prototype’s scope, hardware complexity, software requirements, engineering effort, and number of design iterations. A basic sensor demonstration is very different from a connected product with custom electronics, a mechanical enclosure, cloud integration, and extensive testing.
A realistic estimate should separate component purchases from engineering and integration work. It should also identify which features are included, what testing is required, and whether manufacturing preparation falls within the project budget.
What affects IoT prototyping costs?
Hardware and components
Development boards and standard modules can reduce initial design effort. Specialized sensors, wireless modules, connectors, batteries, and custom mechanical parts may increase component expenses, especially when several alternatives must be tested.
PCB design and fabrication
A custom circuit board requires schematic design, layout, component sourcing, assembly, debugging, and possibly additional revisions. Complex power circuits, high-speed interfaces, or radio-frequency requirements can increase both cost and development effort.
Firmware development
Basic data collection is generally less demanding than firmware supporting multiple sensors, low-power modes, secure communication, diagnostics, error recovery, and over-the-air updates. The required reliability and complexity influence the time needed to build and validate the software.
Cloud and application development
A basic telemetry dashboard requires less work than a complete application with user accounts, device provisioning, permissions, notifications, reporting, and device-management features. Integrating with existing systems can introduce additional dependencies and testing requirements.
Testing and iteration
Bench and field testing may reveal issues that require firmware changes, new components, PCB revisions, or mechanical adjustments. Budgets should allow for these iterations rather than assuming the first design will meet every requirement.
Manufacturing preparation
A working prototype is not necessarily ready for repeatable production. Design-for-manufacturing reviews, component availability checks, compliance assessments, and production documentation may require further investment before launch.
For a wider breakdown of product development expenses, see the guide to the cost of prototyping a product.
How long does IoT prototyping take?
Development time depends on what must be proven, how much custom engineering is needed, and how quickly hardware and software can be tested. A simple experiment using familiar development boards will usually involve fewer stages than a custom connected device with strict power or environmental requirements.
| Development stage | Typical scope | Main factors affecting duration |
|---|---|---|
| Proof of concept | Validate one or two critical functions | Component availability and sensor integration |
| Functional prototype | Connect hardware, firmware, and a basic interface | Feature scope and integration complexity |
| Integrated prototype | Add representative PCB or enclosure and improved error handling | Fabrication, mechanical design, and testing |
| Pilot preparation | Validate operation in the intended environment | Field trials, security, reliability, and compliance needs |
These are planning stages rather than guaranteed delivery timelines. Projects with familiar components may progress quickly, while custom RF design, difficult sensing requirements, limited component availability, or complex software integration can extend the schedule considerably.
A useful estimate divides the project into milestones with measurable outcomes. Reserve time and budget for integration, failure investigation, and design revisions instead of allocating all available resources to the initial demonstration.
7. Testing, Security, and Production Readiness
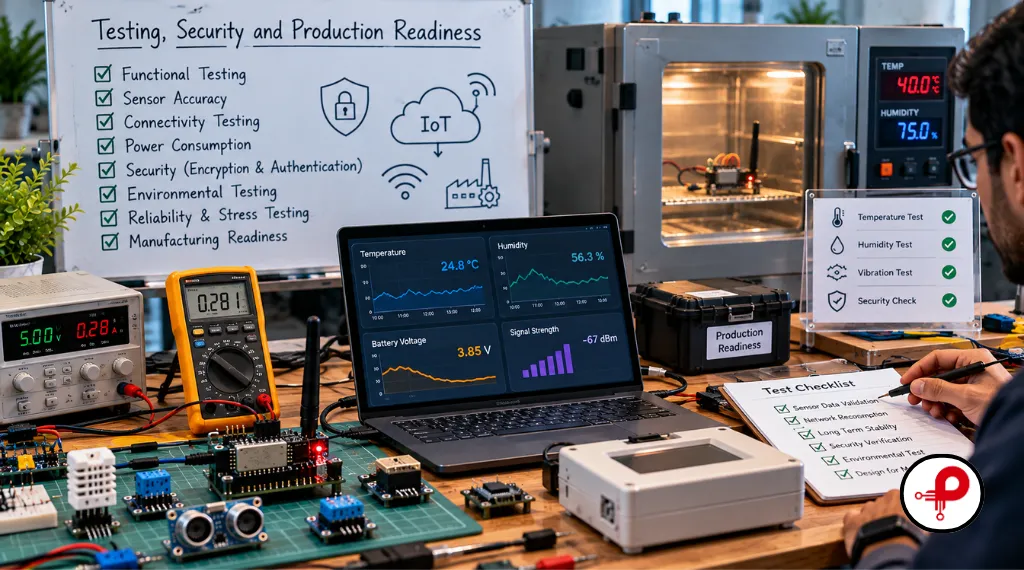
A successful bench demonstration proves only that the device worked under the conditions tested. Before advancing toward production, the prototype should be evaluated against the actual operating environment, system requirements, and risks associated with connected hardware.
Functional and integration testing
Confirm that sensors, interfaces, control outputs, and software components behave as expected. After testing individual components, evaluate the complete system to verify that measurements, communication, processing, and displayed results remain consistent.
Important test cases include missing or invalid sensor readings, network disconnections, power interruptions, unexpected restarts, duplicate messages, incorrect timestamps, and temporary server unavailability. The team should also determine whether the device recovers appropriately after each failure.
The objective is not to eliminate every possible error during the earliest experiment. It is to identify the failures that matter most, understand their causes, and establish predictable behaviour as the prototype matures.
Environmental and power testing
Test the device in conditions that resemble its intended environment. An indoor bench test may not reveal problems caused by vibration, moisture, dust, temperature changes, poor reception, electrical noise, or an enclosure that affects sensor performance.
For battery-powered devices, measure current during representative operating cycles and compare the results against the required battery life. Repeat relevant measurements after substantial firmware or hardware changes because even small updates can affect wireless activity, sleep behaviour, or energy consumption.
Security from the beginning
Connected devices introduce risks because a compromised device, account, or communication path may expose information or affect system behaviour. Security decisions should therefore influence the early design instead of being treated as a final checklist before release.
Consider the following practices during prototyping:
- Use unique device identities and appropriate authentication.
- Encrypt sensitive communication where supported and required.
- Avoid hard-coded shared credentials and default passwords.
- Restrict administrative access and protect secrets.
- Validate inputs and handle unexpected messages safely.
- Plan how firmware and security updates will be delivered.
- Collect only the data needed for the product’s purpose.
Think about device identity, secure provisioning, access controls, and updates before hardware and software decisions become difficult to change. Security requirements introduced late may affect memory, component selection, firmware architecture, and cloud integration.
For additional background, NIST’s IoT cybersecurity program FAQs discuss cybersecurity considerations for IoT devices and the wider systems in which they operate.
Mechanical design and manufacturing preparation
An electronic prototype can operate correctly on a workbench but remain unsuitable for its intended physical environment. The enclosure must accommodate board dimensions, connectors, antenna placement, heat dissipation, mounting arrangements, and the conditions the device will encounter.
The electronic enclosure design guidelines can help with early mechanical planning. As the design matures, consider how components will be assembled, inspected, and tested consistently during manufacturing.
For hardware that needs repeatable production testing, PCB design for testability provides relevant guidance. Good test access and clear diagnostic points can make faults easier to locate during development, assembly, and later maintenance.
When is an IoT prototype ready for the next stage?
Readiness should be based on recorded evidence rather than appearance. Before moving forward, the team should understand which requirements have passed, which risks remain, what the prototype cannot yet demonstrate, and what changes are needed for a pilot or production-oriented design.
Useful evidence includes test records, a known hardware configuration, version-controlled firmware, documented interfaces, measured power consumption, recovery-test results, and a list of unresolved issues. These records provide a foundation for evaluating future changes and communicating technical status.
The transition should also include a review of component sourcing, manufacturing, device onboarding, maintenance, security updates, and customer support. The broader electronic product design workflow provides context for how prototyping fits into a product’s development lifecycle.
If your project needs support turning an initial connected-device concept into a testable physical design, review Prototype Guru’s prototyping services.
8. FAQs About IoT Prototyping
1. What is IoT prototyping?
↑2. How do you build an IoT prototype?
↓3. Which hardware is best for IoT prototyping?
↓4. Which connectivity technology should an IoT prototype use?
↓5. How much does an IoT prototype cost?
↓6. How long does it take to develop an IoT prototype?
↓7. What is the difference between an IoT prototype and an MVP?
↓8. How do you test an IoT prototype before production?
↓Conclusion
IoT prototyping provides a practical way to validate connected-device ideas before committing to a final design. By defining measurable goals, selecting appropriate hardware, testing the complete device-to-cloud system, and addressing power, security, and reliability early, development teams can make better engineering decisions and reduce avoidable redesigns.
The objective is not simply to build the most polished prototype as quickly as possible. It is to build the right prototype to answer the most important technical questions, document the results, and use that evidence to guide the next stage of product development.