How much do prototypes cost? A prototype can cost less than $100 for a very simple DIY type of thing and can easily run into the $50k range for a more complex electronic product. The difference is largely down to what you’re trying to build and the amount of engineering that’s required. A simple 3D printed enclosure is a very different proposition to a wireless device which has a custom PCB, firmware, battery management and a working enclosure.
If you’re coming up with a new product it’s useful to have an understanding of your product prototype cost prior to placing an order with a supplier. That way you can determine which bits of the design you want to test first and where you’re prepared to make a bigger investment.
This guide looks at the typical prototype cost, the various methods of manufacture, the electronics prototype cost and some practical ways of keeping your project within budget. If you want a line by line breakdown of the cost of prototyping a product, our cost of prototyping a product guide goes into more detail.
1. How Much Do Prototypes Cost?
There’s no one price for a prototype. You could well be spending a very small amount to test an idea out with off the shelf components, but a fully working product will require mechanical design, electronics, assembly and a number of test cycles.
The following are indicative figures for planning purposes only. Actual quotes will vary depending on the supplier, location, material, complexity of the project and the range of services required.
| Prototype type | Estimated cost | What it helps you test |
|---|---|---|
| DIY proof of concept | $0 to $500 | Whether the basic idea works |
| Basic 3D printed model | $20 to $600+ | Shape, dimensions and fit |
| Appearance prototype | $300 to $5,000 | Finish, ergonomics and visual design |
| Functional mechanical prototype | $1,500 to $15,000+ | Moving parts and mechanical performance |
| Basic electronics prototype | $500 to $5,000+ | Circuit operation and basic functionality |
| Advanced electronics prototype | $5,000 to $50,000+ | Custom electronics, firmware and enclosure integration |
| Production intent prototype | $10,000 to $100,000+ | Manufacturing readiness and assembly |
These price ranges overlap as the amount of work is just as important as the type of prototype. A very simple concept could be validated with an ESP32 dev board and a couple of sensors. A more complex compact wireless product could require a custom PCB, battery management, firmware, and a thoughtfully designed enclosure.
For further context on pricing see CAD Crowd’s 2026 prototype cost guide and RMA Engineering’s prototype pricing guide. Their estimates are for various types and stages of prototyping. Always check the original sources if you’re going to use any of the specific figures in a project budget.
What does a prototype quotation include?
A quote may cover just the physical part or it may cover the engineering needed to turn it into a working product.
If you already have a finished CAD file then a 3D printing service may well just manufacture the enclosure. If you go to a product development house with an idea and no files at all then the work could encompass requirements, CAD modelling, component selection, PCB design and testing. Our guide to choosing a prototype development company explains what to ask before you sign anything.
Before comparing quotations, check whether they cover:
- Product design and engineering
- CAD files, PCB design and firmware
- Materials and electronic components
- Fabrication and assembly
- Testing and debugging
- Design revisions and additional builds
- Shipping, taxes and specialist testing
A lower quote may well exclude the services that another supplier would have included. The only way to get a real picture of the total cost is to compare the actual deliverables.
2. Prototype Costs by Type and Development Stage
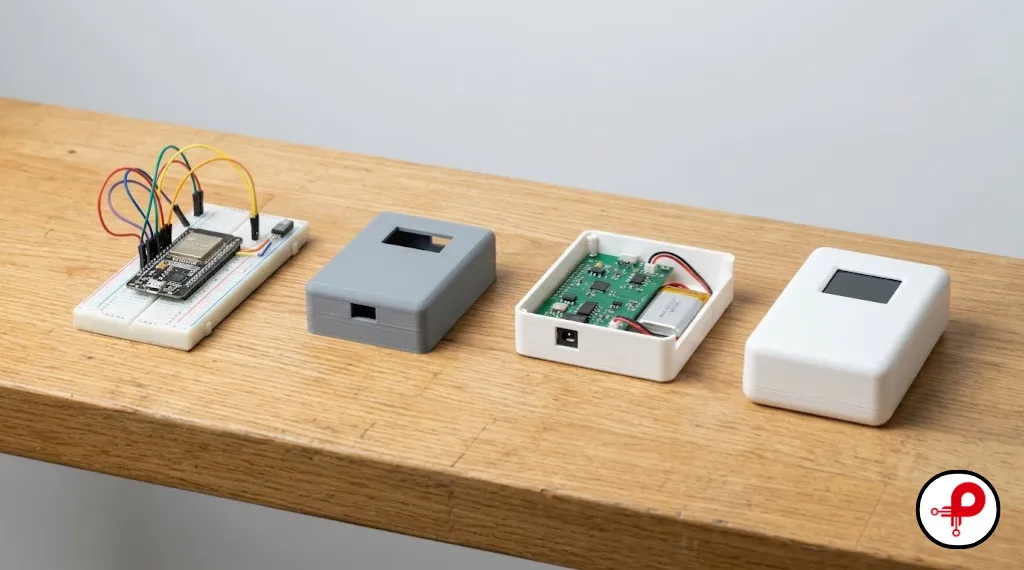
Asking how much do prototypes cost only makes sense once you know which stage you’re at. The type of prototype you need is going to be dictated by the question you’re trying to answer. An early build may be sufficient to establish whether the sensor works at all, whereas a later build may be required to test the full product under actual operating conditions.
Proof of concept prototype
A proof of concept is used to establish whether the idea can work. It could be a piece of cardboard, a basic 3D print, a development board or some off the shelf electronic components.
Indicative budget: $0 to $2,000.
Consider a temp monitoring device. You could just hook up an ESP32 to a temp sensor and have it display the readings, before you go any further and design your own PCB. That way you can test out the sensor, the comms and the basic control logic without having to shell out for a finished enclosure or custom hardware. Our IoT prototyping guide walks through this kind of early connected build.
If the readings are unstable or the circuit is doing the odd thing then you can go and investigate that prior to committing to a more expensive build.
Appearance prototype
An appearance prototype allows you to assess the product’s physical design. You can check its size, shape, finish, button location and ergonomics without necessarily having all of its functions working.
Indicative budget: $300 to $5,000.
A simple printed enclosure may be sufficient to check that the parts will fit. If you need a smooth surface, accurate colour and a proper finish for a presentation then the cost will of course be considerably higher. Our electronic enclosure design guidelines cover wall thickness, mounting and fit.
Functional prototype
A functional prototype will do some or all of the work of the finished product. It may incorporate custom electronics, firmware, sensors, motors, mechanical parts and/or wireless connectivity depending on the design.
Indicative functional prototype cost: $1,500 to $20,000+ (with complex electronic products potentially running a lot higher).
A basic mechanism may only require a few fabricated parts. A connected device on the other hand could require circuit design, firmware, power management, enclosure integration and debugging.
Development boards can be used to establish that the core functions do work. Once the design has been tested then a custom PCB may be used to allow the electronics to be incorporated into a much smaller and more practical product. If you’re at that stage, our low cost PCB prototype guide shows what bare boards cost and where the hidden fees sit.
Production intent prototype
A production intent prototype is used to establish whether the design can in fact be manufactured and assembled as intended. It may employ representative materials, improved components and manufacturing processes which are similar to those which will be used in the final product.
Indicative budget: $10,000 to $100,000+ depending on the product and the scope.
This phase could involve design for manufacture reviews, supplier coordination, reliability testing and preparation for a pilot build.
Remember that a production intent prototype is not a production run. Tooling, manufacturing setup, certification and commercial quantities will all be separate items and will all have their own budgets.
3. How Much Do Prototypes Cost by Manufacturing Method?
The manufacturing method has an impact on both the cost and the type of testing that can be carried out. A process which is ideal for checking the shape of an enclosure may be totally inappropriate for assessing strength, temperature resistance or indeed production viability.
| Manufacturing method | Indicative cost | Typical use |
|---|---|---|
| FDM 3D printing | $20 to $200+ | Basic shapes and fit checks |
| SLA or resin printing | $50 to $500+ | Fine details and smoother finishes |
| CNC machining | $100 to $1,000+ per part | Accurate metal or plastic parts |
| Urethane casting | $200 to $5,000+ | Small batches of similar parts |
| Rapid injection moulding | $1,000 to $10,000+ | Selected low volume builds |
| Production injection moulding tooling | $10,000 to $100,000+ | Tooling for higher volume production |
These are very broad estimates, not guaranteed prices. The figures may be for different volumes and may include different levels of setup, so your rapid prototyping cost will depend on the exact part and quantity. See the CAD Crowd prototype cost comparison for more info.
3D printing
3D printing is frequently the sensible place to start when it comes to physical prototypes as it gets rid of the initial outlay of an injection mould.
FDM is ideal for basic shapes, brackets and enclosure fit checks. Resin is useful when you need finer detail or a smoother surface finish. Your 3D printing prototype cost is a function of part size, material, print time, amount of support required and finishing. Formlabs’ breakdown of 3D printing costs shows how equipment, material and labour add up.
A cheap print can be used to verify that the dimensions are correct, but that in itself doesn’t prove that the part will survive heat, impact or any degree of movement. The material has to be chosen in accordance with the conditions the part will be subjected to.
CNC machining
CNC machining is the process of removing material from a solid block to produce a component. It can be of use when you need a component with very accurate dimensions, a functional metal part or one which has material properties that are closer to those of the actual product.
A simple aluminium bracket may be fairly inexpensive. A complex part with tight tolerances, multiple machining operations and additional finishing can be a lot more expensive. The geometry, the material and the inspection requirements all have an effect on the quotation.
For an early enclosure shape check 3D printing may be quite adequate. CNC machining becomes a more attractive proposition when material properties or dimensional accuracy are the key issues.
Urethane casting and injection moulding
Urethane casting uses a mould to make small runs of parts. It can be of use when you need a number of similar parts all with the same finish.
Injection moulding requires tooling and that can be a significant capital outlay. Prototype tooling may reduce that initial cost in some projects, but the right option depends on the quantity you need, the material and how close the design is to being final. Protolabs explains how mould cost builds up, and its page on prototype tooling covers when a softer, cheaper tool makes sense.
4. What Determines the Cost of a Prototype?
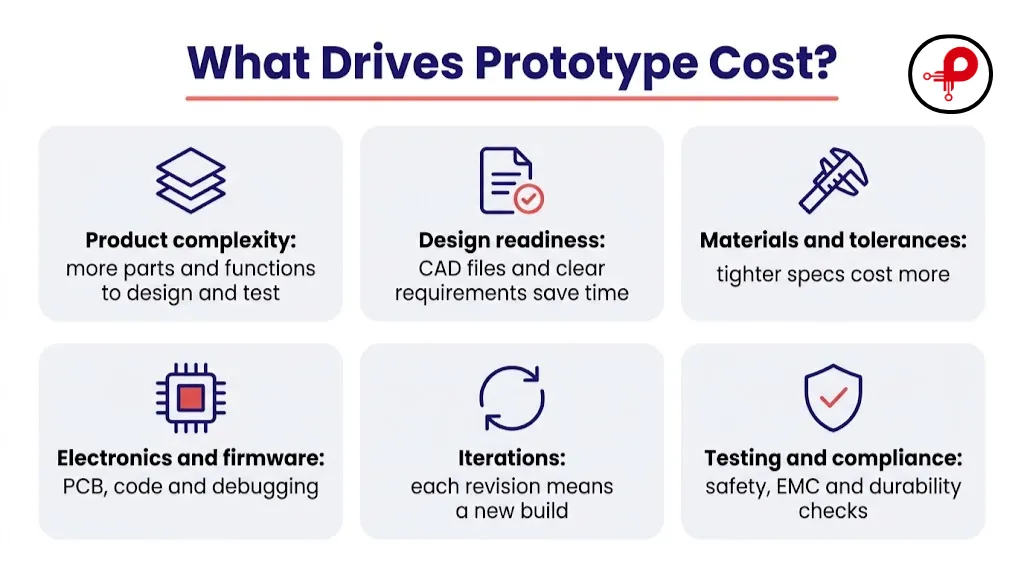
Two products can look similar but have very different development costs. A simple plastic enclosure may require only a few design changes, while an electronic product with sensors, wireless communication and a custom PCB can involve several rounds of engineering.
The real answer to how much do prototypes cost for your own product comes down to a handful of factors. Understanding them will help you estimate your budget before development begins.
Product complexity
The more parts and functions a prototype contains, the more work may be needed to design and test it.
For example, a basic temperature monitoring device might need one sensor, a microcontroller and a display. Adding wireless connectivity, battery charging, a mobile application and a custom enclosure introduces additional hardware and software requirements.
The components must also work together. A circuit may produce electrical noise, a sensor may give inconsistent readings, or the enclosure may not leave enough room for connectors. Resolving these issues can add engineering time and increase the total cost.
Design readiness
A project with completed CAD files, circuit diagrams, dimensions and clear requirements gives the development team a useful starting point.
If you approach a supplier with only an idea, the team may first need to work out how the product should function, select suitable components and develop the initial design. These tasks take time before any physical prototype can be manufactured.
You do not need every detail finalized before requesting a quotation. However, sharing existing designs and explaining the intended functionality can help suppliers understand the work involved.
Materials and tolerances
Material selection affects the prototype’s strength, weight, appearance, temperature resistance and manufacturing cost. Aluminium, stainless steel, standard plastics and engineering grade materials all have different properties and processing requirements.
Dimensional tolerances matter as well. A decorative cover may not require the same precision as a part that must fit around a bearing or align with another component. Tighter tolerances can require more machining time and additional inspection.
For early prototypes, specify the accuracy the design actually needs. Paying for unnecessary precision can increase costs without improving the result of your test.
Electronics and firmware
For an electronic product, the bill of materials is only one part of the budget. Electronics prototype cost may also involve circuit design, PCB layout, embedded programming, sensor integration, communication protocols and debugging. If you don’t have that skill set in house, PCB design services for startups can take on the layout and bring up work.
Battery powered and wireless devices can introduce further challenges. Engineers may need to investigate charging behaviour, power consumption, antenna performance and heat generation.
A circuit that works on a development board is a useful starting point, but integrating everything into a compact product can require additional work. The final cost depends on how much of that engineering has already been completed.
Number of prototype iterations
The first prototype rarely answers every question. Testing may reveal a component that overheats, a connector that does not fit, or a sensor that behaves differently under real operating conditions.
Each revision can involve new components, updated design files, another fabrication order, assembly and retesting. Even a small change can become expensive if it requires a new PCB or a redesigned enclosure. Our article on why cheap hardware development ends up costing more shows how skipped steps turn into extra spins.
When preparing your budget, consider which parts of the design are still uncertain. If the electronics are untested or the mechanical design is incomplete, leave room for additional builds rather than assuming the first version will be final.
Testing and compliance
Basic functionality checks are usually less demanding than specialist testing. Depending on the product, you may need to evaluate temperature performance, vibration, durability, electrical safety or electromagnetic compatibility. Our PCB testing and inspection guide covers the board level checks.
Formal certification is not necessary for every early prototype. However, products intended for commercial sale in regulated markets may require additional testing and documentation before launch.
Identify the tests needed to validate your prototype and distinguish them from certification or production validation that may happen later.
5. What Should a Prototype Budget Include?
A useful prototype budget separates the major expenses instead of treating development as one unexplained price. It’s also the most practical way to answer how much do prototypes cost before you speak to a supplier.
| Budget item | What it covers |
|---|---|
| Requirements and planning | Product goals, features and technical constraints |
| Design and engineering | CAD, mechanical design and circuit development |
| Components and materials | Sensors, chips, connectors, plastics and metals |
| Fabrication | 3D printing, CNC machining and PCB production |
| Assembly | Soldering, wiring and mechanical integration |
| Firmware and software | Embedded code, control logic and connectivity |
| Testing | Functional checks and validation |
| Revisions | Updated designs, replacement parts and additional builds |
| Shipping and taxes | Delivery, customs charges where applicable and other costs |
Some suppliers combine several of these expenses into a single project fee. Ask for a breakdown of the work and confirm which design files, documentation and physical units you will receive.
Example: Estimating the cost of an electronics prototype
Suppose you want to build a connected sensor device with a temperature sensor, wireless communication, a custom PCB and a 3D printed enclosure.
The following example shows how a project budget might be organized. These amounts are illustrative allowances, not a supplier quotation or a verified market average.
| Expense | Example allowance |
|---|---|
| Requirements and initial design | $500 |
| PCB design and fabrication | $700 |
| Electronic components | $300 |
| Enclosure design and 3D printing | $350 |
| Assembly and integration | $400 |
| Firmware development and debugging | $900 |
| Functional testing | $500 |
| Estimated base cost | $3,650 |
| Contingency allowance (15%) | $547.50 |
| Illustrative total budget | $4,197.50 |
The calculation is straightforward: the base estimate of $3,650 plus a 15% contingency of $547.50 gives a total planning budget of $4,197.50.
Notice that the electronic components account for only $300 of the example budget. PCB work, firmware, assembly and testing make up much of the remaining cost. This is why the price of the components alone is not a reliable estimate of the cost of developing an electronic product. The PCB manufacturing and assembly process explains where that board level money goes.
Your actual budget could be lower if you already have a tested circuit and working firmware. It could increase if you need custom wireless hardware, a battery management system, more advanced enclosure work or specialist testing.
Before requesting a quotation, decide which functions the prototype must demonstrate and what you expect the supplier to deliver. For the bigger picture beyond the prototype, read Prototype Guru’s article on the real cost of building a hardware product.
6. How to Reduce Prototype Costs Without Creating Problems Later
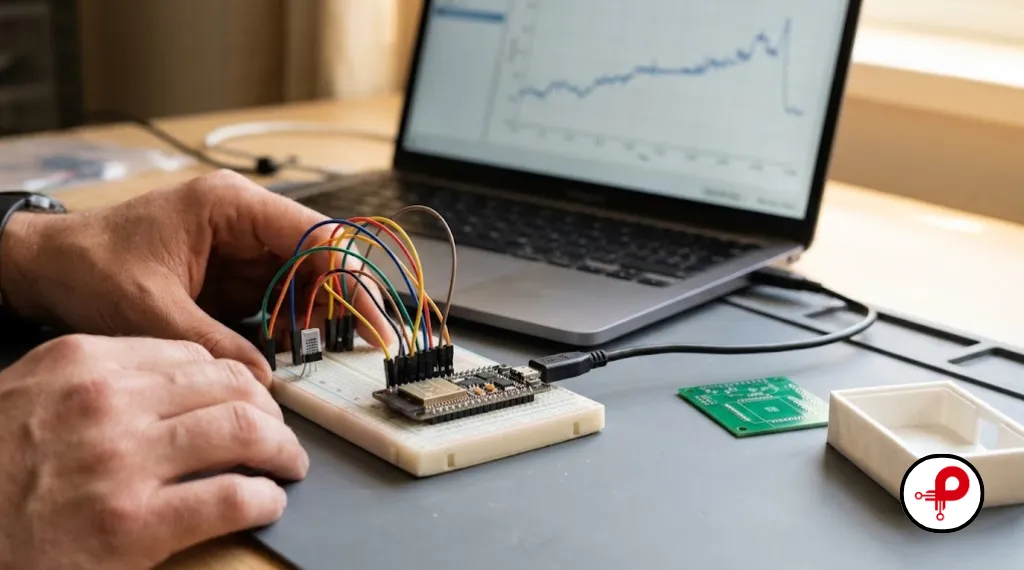
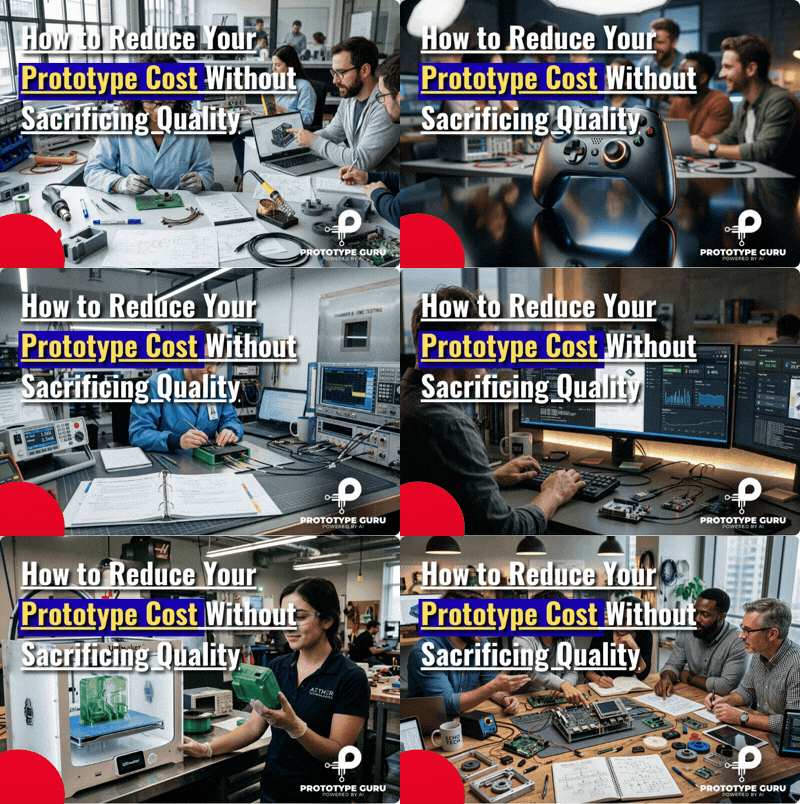
Cutting prototype costs doesn’t necessarily mean going for the cheapest material or the cheapest supplier. A better way is to simply not pay for work that you haven’t got to do yet, whilst keeping the tests that actually matter. Our guide on how to reduce prototype cost without sacrificing quality goes deeper on this.
Start with the main function
Decide what the prototype needs to prove before you go to the trouble of choosing its design or its method of manufacture.
If you’re just testing out a temp sensor you might be quite happy with nothing more than a dev board, the sensor and a means of displaying the readings. The custom PCB and finished enclosure can be deferred until the basic circuit is working.
This allows you to look at the technical issues early on when it’s generally far easier to change the design.
Use development boards before designing a custom PCB
An ESP32, an Arduino or some other suitable development board can be used to test sensor behaviour, the control logic and the connectivity prior to committing to any custom electronics.
For example you could connect a sensor to an ESP32 and verify that it’s sending reliable readings over WiFi. Once that’s working you can then decide how you want to incorporate that circuit onto a smaller board.
Dev boards aren’t suitable for every final product but can be very useful in the early stages of experimentation.
Choose the manufacturing process carefully
Match the process to the purpose of the prototype.
A 3D printed part may be quite adequate for checking dimensions and for assembly. CNC machining would be the preferred method if you required a specific material property or a very high level of dimensional accuracy. Production tooling would of course be the option to consider if the design and the expected volumes were such that it made sense to do so.
Remember that a prototype process doesn’t necessarily equate to the final manufacturing process. A part that prints perfectly in 3D may well require modification prior to injection moulding.
Keep the first version focused
Every extra feature adds design, implementation and testing effort. If you’re primarily after a wireless sensor to verify then you probably won’t need the advanced reporting, the slick mobile app and the production quality enclosure in the first build.
Stick to the functions that are needed at this stage of development. Add on the other features when they become required.
This doesn’t mean we’re ignoring safety or the fundamental technical requirements. It simply means separating out what has to work now from what can reasonably be developed in the future.
Prepare a clear design brief
Suppliers can actually get a much better estimate of a project if they understand what you’re trying to build. Your brief should cover:
Key Prototype Specifications
-
Product Purpose & Functions
The product’s purpose and required functions
-
Design Assets
Available dimensions, drawings, CAD files or schematics
-
Materials & Environment
Material and environmental requirements
-
Electronics & Software
Whether electronics, firmware or software are needed
-
Validation & Testing
The tests the prototype must pass
-
Budget & Timeline
Your target budget and timeline
-
Quantity
The number of units required
-
Deliverables
The files, documentation and physical units expected at delivery
You don’t need to know all the engineering details before you go to a supplier. A clear statement of what you’re after and what information you already have is a good starting point.
Compare complete quotations
Get itemised estimates from the suppliers who have the relevant experience. Compare the engineering, the fabrication, the number of units, the revision policy, the lead time and the testing.
For instance one supplier might quote only for the PCB fabrication, the other might quote for the design, the assembly and the debugging. The latter quote may be higher, but it’s for a lot more work.
Check what’s in it before you decide which one is actually the better value.
Consider manufacturing requirements early
Think about how the product is going to be assembled in the end rather than just whether the prototype works.
Standard components, readily available fasteners, sensible tolerances and a practical enclosure will all go some way to minimising the amount of rework later on. A printed enclosure may well contain all the components but again could be a very difficult thing to assemble if the screws are all out of reach and the internal wiring is all squashed up.
Identifying these issues early will prevent unnecessary changes down the line when the product gets closer to manufacturing.
See Prototype Guru’s guide to design for manufacturing and assembly for more info.
7. Frequently Asked Questions About Prototype Costs
1. How much does a simple prototype cost?
↑2. How much does an electronics prototype cost?
↓3. Why do the prototype quotations differ so much?
↓4. Is 3D printing the cheapest method of prototyping?
↓5. Does the prototype quote include product design?
↓6. Is prototype cost the same as manufacturing cost?
↓7. How many prototypes do I actually need?
↓8. How do I get an accurate prototype quote?
↓Conclusion
So, how much do prototypes cost? Anything from a very small amount for a basic DIY prototype to tens of thousands of dollars for a fairly complex electronic product or a production intent build. The amount you end up spending is going to be dictated by the design, what you’re trying to achieve and the amount of engineering that’s required to get those functions to work together.
Start by defining what the prototype must prove. Use a suitable low cost approach to test the essential functions, then invest in custom hardware, refined materials and additional features as the design develops.
Before committing to a supplier, make sure you understand what the quotation includes and what you will receive. Accounting for engineering, fabrication, assembly, testing and possible revisions gives you a more realistic product prototype cost and a clearer path to the next stage of product development.